OpenAI DALL-E Base64 Image Generation with HTML, PHP, cURL, and Javascript AJAX
|
This is a barebones example using OpenAI’s DALL-E Base64 image generation with PHP from a user prompt on a web page.
Image generation is in beta as of this writing.

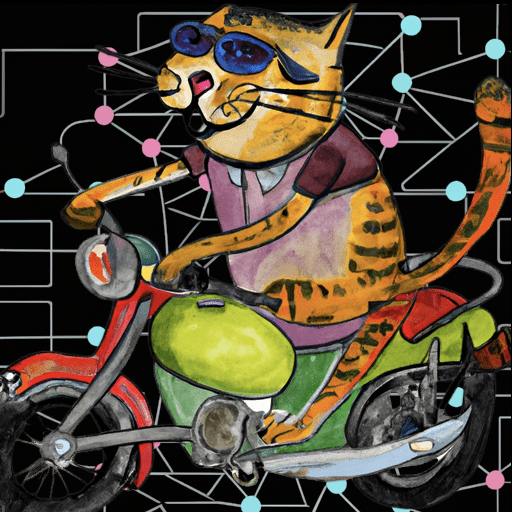
The drawing of the cat riding on the motorcycle was generated using the code in this article. Then using an image editor the cat motorcycle image was pasted over a neural network illustration from free stock imagery and then over a black background.
I wanted to write a PHP program that would use the DALL·E API from OpenAI to generate images. DALL-E is an AI system that can create realistic images and art from a description in natural language. Like ChatGPT there is an user interface at a charge to access DALL-E. You can also write code to access it. Visit the OpenAI DALL-E web page to learn more about it and access the user interface.
“In January 2021, OpenAI introduced DALL·E. One year later, our newest system, DALL·E 2, generates more realistic and accurate images with 4x greater resolution.” – OpenAI
– OpenAI
This example requests base64 data from the DALL-E API. You can also request an image URL. The code for a URL is slightly different and you can check that out at OpenAI DALL-E Image URL Generation with HTML, PHP, cURL, and Javascript AJAX.
ChatGPT GPT-4 was used to assist in the code writing. Because its knowledge cutoff date of September 2021 it used some parameter values that were changed since. It also included parameters that are no longer needed for the same reason. Solutions to all were easily remedied using debugging tools and documentation.
You do need an account and an API key from the OpenAI Platform. If you are using ChatGPT then you have an account.
I kept the user interface style simple but gets the job done for a learning example.

To keep coding simple I loaded the API key using a hidden file. There is only one line in the file and it contains the API key. My file name is .open-php-curl-env. You can use any file name. Here is my code for that.
		// Load the OpenAI API key
		// Create a text file (name optional) with your OpenAI API Key on the first line.
		$api_key = file_get_contents('.openai-php-curl-env');
You need credits with OpenAI in addition to the API key. Recently new accounts have a free grant of credits.
PHP uses the cURL library to communicate with OpenAI’s API. The API endpoint is https://api.openai.com/v1/images/generations. There are various options to include in the request body. I put them into an array for use in cURL.
		$data = array(
			"prompt" => $_POST['prompt'],
			"size" => '512x512', //256x256, 512x512, or 1024x1024 pixels
 			"n" => 1, // Number of images
			"response_format" => "b64_json", //url | b64_json. URLs will expire after an hour.
		);
The prompt is the user request text coming from the web page. There are four image sizes. Smaller sizes have faster response times and perhaps they use less credits.
More than one image variation can be requested at a time using the n value. The images are returned in an array. The request value is set to one since the example code is written to only use one image.
There are two response format values. The url value returns a URL that expires after 1 hour. The b64_json value returns image data. In either case you can copy or save the image from the web page. The url value can be used with modifications to this code and you can check those in this complete example I posted at OpenAI DALL-E Image URL Generation with HTML, PHP, cURL, and Javascript AJAX
The cURL code is template ready to plug in the values.The OpenAI API request endpoint is in line 25. Line 28 is where data is converted to JSON format for the request body. Line 31 has the api key in the $api_key variable.
The request occurs on line 33. If the cURL fails, the error is dumped to the error log on line 35. The error logging line can be removed unless you are testing and debugging.
		// cURL processing
		$ch = curl_init();
		curl_setopt($ch, CURLOPT_URL, 'https://api.openai.com/v1/images/generations');
		curl_setopt($ch, CURLOPT_RETURNTRANSFER, 1);
		curl_setopt($ch, CURLOPT_POST, 1);
		curl_setopt($ch, CURLOPT_POSTFIELDS, json_encode($data));
		$headers = array();
		$headers[] = 'Content-Type: application/json';
		$headers[] = 'Authorization: Bearer ' . $api_key;
		curl_setopt($ch, CURLOPT_HTTPHEADER, $headers);
		$response_raw = curl_exec($ch);
		if (curl_errno($ch)) {
			error_log('error: ' . curl_error($ch));
If the OpenAI API request succeeded, then the image’s base 64 data can be extracted from the response’s data array. The response is in the JSON format so it needs to be decoded for use in PHP. That is done on line 39. The lack of the error key in the response signifies that OpenAI’s API succeeded. We are doing nothing if there is an error key but simply log the response. You can uncomment line line 37 if there are issues with the response value.
Line 42 is where the image base64 data is extracted from the response’s datadatab64_json key.
For more than one image, then you need to modify to loop though the data
		}else{
			//error_log('$response_raw: ' . print_r($response_raw,true));
			// Decode the JSON response
			$jsonResponse = json_decode($response_raw, true);
			if (!isset($jsonResponse['error'])) {
				// The image
				$base64Image = $jsonResponse['data'][0]['b64_json'];
				// The image in the response
				$rtn_val['image'] = $base64Image;
				$rtn_val['success'] = true;
			}
The $rtn_val variable is my coding choice for packaging the data to return to the front-end. I use a success key and it is defaulted to false at the start of the file on line 4 and only set to true once all the processing has completed successfully. The $rtn_val variable’s image key is just a programmer’s choice for tagging the return data for front end consumption.
I am using the JSON format for AJAX, so the $rtn_val is converted to JSON format and for the response sent to the waiting front end.
//Respond with JSON content
header('Content-Type: application/json');
echo json_encode( $rtn_val );
How to handle AJAX requests and responses is a programmer’s choice. It is important to validate and sanitized data received from the front-end. Minimal validation was added on lines 6 to 12. No sanitation is included. Since the front end data is sent untouched to the OpenAI API, it is assumed sanitation will occur there.
The Javascript file uses jQuery to handle the AJAX lines 18 – 46. Line 32 tests for the success key in the response data. If its true then on line 33 positive user feedback shown in the results element. The image base64 data is set to the img element’s src element on line 35. If the success key is false, negative user feedback is added on line 37.
	function sendPromptAjax(){
		$('#results').html('...processing...');
		let dataSend = {};
		dataSend['prompt'] = $('#prompt').val();
		$.ajax(
			{
				type:"post",
				url:"openai-image-02.php",
				data:dataSend,
				dataType:'json',
			}
		)
		.done(
			function(data, status){
				if (data.success){
					console.log("sendPromptAjax | Success true");
					$('#results').html('Success');
					$("#open-ai-image").attr("src", "data:image/png;base64," + data.image);
				}else{
					$('#results').html('Request failed.');
				}
			}
		)
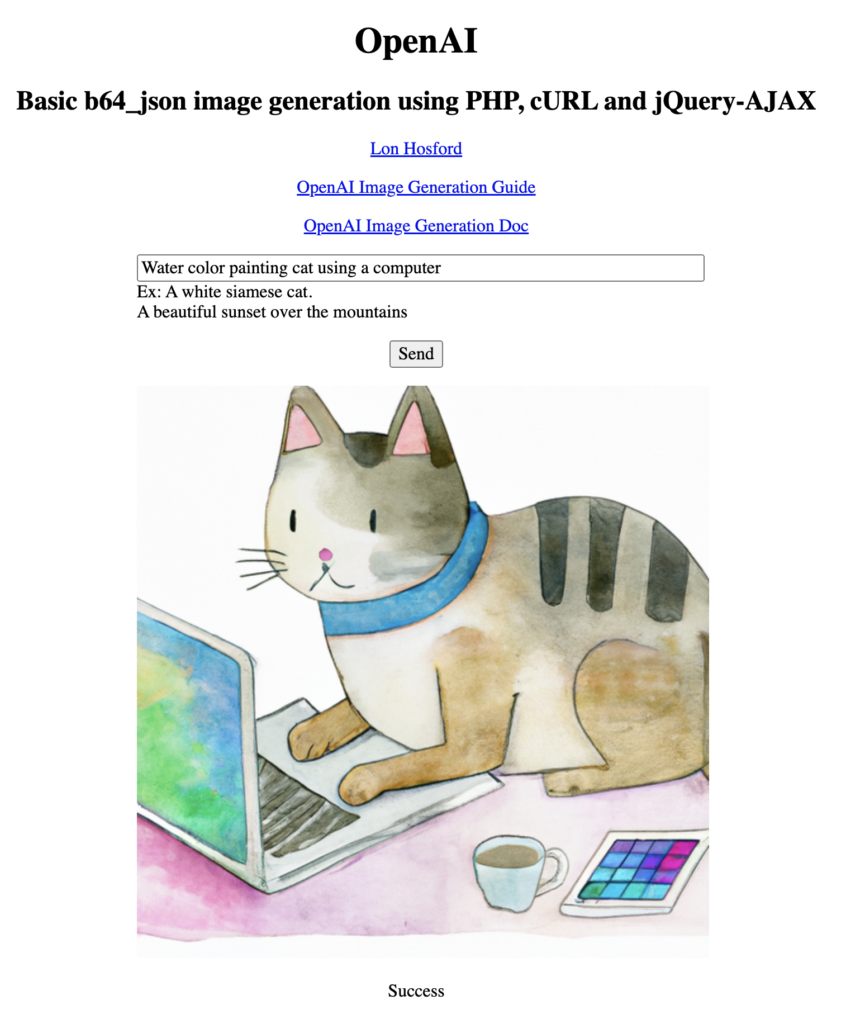
The key HTML elements are on lines 23-26 of the HTML file. jQuery listens to click events for the button element on line 24 and sends the input element value on line 23 to the backend.
Processing, positive and negative message are shown in the results element on line 26 and are updated by jQuery.
The image element’s src attribute on line 25 is set to the base64 data by jQuery.
	<div><p class="text-align-left"><input id="prompt" type="text" placeholder="Enter a prompt" ><br>Ex: A white siamese cat.<br>A beautiful sunset over the mountains</p></div>
	<div><p><button id="send">Send</button></p></div>
	<div><image id="open-ai-image"/></div>
	<div><p id="results"></p></div>
There are 5 files in total.
.openai-php-curl-envopenai-image-02.htmlopenai-image-02.cssopenai-image-02.jsopenai-image-02.php