Categories
Articles

Adobe Flex Localization Dynamically Loaded Resource Modules

I followed the example at  Adobe Labs written by Gordon Smith September 25, 2007 to create a basic language localization example that would load the locales dynamically at runtime.

I had some bumps in making the example work in that it did not load the language when launched. This could be due to differences in the  version Gordon was using or just those nasty timing issue you get in the Flex framework. The basic issue was to add an initialization event handler to the example and the line resourceManager.localeChain=[“en_US”]; in it.

However Gordon’s tutorial was essential to understanding the geekish implementation of Flex dynamic localization. You have the copylocale utility program to run in the Flex sdk bin folder to set up Flex for each language. I created a windows batch file for it and included in my example. It makes it easy to add a language to Flex at a later date with a simple copy and edit.

Flex uses a separate swf for each language to load them at run time. You create these with command line steps using the mxmlc compiler and lengthy arguments. Since you have to do this every time a language item changes, I again created some batch files to automate the process.

The completed example is located at Adobe Flex 3 Basic Locales Dynamic Runtime Localization With Resource Modules.

Categories
Articles

Adobe Flex 3 Runtime Language Localization Embedded Locals

I started to review the Adobe Flex 3 language localization. The site I used to learn is at Adobe Labs written by Gordon Smith September 25, 2007.

My opinion is the localization implementation suffers a geekish solution. So even Gordon’s super effort, you get lost in the terminology geeks have used to define the elements of localization features. So I did eventually get through to make my own examples based on Gordon’s work.

This example shows how to embed the locale language in the Flex swf. This of course make the Flex swf potentially larger. However if you have a small amount of language or only a few languages, you might find this solution more expedient.

Look it over and download at Adobe Flex 3 Basic Embedded Runtime Localization Locales.

I also followed Gordon’s modular version of localization. This allows loading localization data during runtime. Gordon’s example has problems with Flex timing when you go to put it to work. I solved the timing issues and will post on that as well with the fixes. But also there are even more geekish aspects to get Flex even set up to do this.

Categories
Articles

Adobe Flex VideoPlayer with Scrubber for Progressive Download and Flash Media Server Streaming

Frustrated finding a good basic Flex 3 video player using the VideoPlayer class and having a HSlider for the scrubber, I decided to make one myself.

I share it with you at Adobe Actionscript Flash Flex Examples.

I tested it with both progressive download and with Flash Media Server 3 at my hosting service Influxis.

It seems to run well. It does auto play each video.

The scrubber bar maintains the play or paused state. So if the video is paused, moving the scrubber bar when released does not start playing the video. Likewise if the video is playing, moving the scrubber bar continues play when the thumb is release.

I designed this not to resize the VideoDisplay when the Application is resized. This is because I wanted to use it for Camtasia screen captures. However adding width and height properties to 100%  to the VideoDisplay object resize the video playing.

Flex components used include VideoDisplay, DateFormatter,  Panel, ControlBar, ComboBox, HSlider,  Label, Button, VBox and HBox.

Enjoy!

Categories
Articles

Flex Tilelist Listbase Fails on Resize

I often find myself investigating code issues from other programmers. Recently I had to deal with a rather complicated Flex 3 container problem. The problem occurred when resizing an application. The runtime error was


TypeError: Error #1009: Cannot access a property or method of a null object reference.
at mx.controls.listClasses::ListBase/addToFreeItemRenderers()[E:\dev\3.1.0\frameworks\projects\framework\src\mx\controls\listClasses\ListBase.as:4770]
at mx.controls.listClasses::ListBase/reduceRows()[E:\dev\3.1.0\frameworks\projects\framework\src\mx\controls\listClasses\ListBase.as:3863]
at mx.controls.listClasses::ListBase/updateDisplayList()[E:\dev\3.1.0\frameworks\projects\framework\src\mx\controls\listClasses\ListBase.as:3639]
at mx.controls.listClasses::TileBase/updateDisplayList()[E:\dev\3.1.0\frameworks\projects\framework\src\mx\controls\listClasses\TileBase.as:2357]
at mx.controls.listClasses::ListBase/validateDisplayList()[E:\dev\3.1.0\frameworks\projects\framework\src\mx\controls\listClasses\ListBase.as:3279]
at mx.managers::LayoutManager/validateDisplayList()[E:\dev\3.1.0\frameworks\projects\framework\src\mx\managers\LayoutManager.as:605]
at mx.managers::LayoutManager/doPhasedInstantiation()[E:\dev\3.1.0\frameworks\projects\framework\src\mx\managers\LayoutManager.as:678]
at Function/http://adobe.com/AS3/2006/builtin::apply()
at mx.core::UIComponent/callLaterDispatcher2()[E:\dev\3.1.0\frameworks\projects\framework\src\mx\core\UIComponent.as:8565]
at mx.core::UIComponent/callLaterDispatcher()[E:\dev\3.1.0\frameworks\projects\framework\src\mx\core\UIComponent.as:8508]

Trying to reproduce the problem was more problematic. First it is all Adobe Flex code in the call stack.

Second the error would not occur unless you went through a set of steps. First you needed to have enough items in the tile list where to cause vertical scrolling. Then you needed to load a different list of items into tile list that did not require a vertical scroll. After that you resized the application to smaller you get the above error.

The code referenced in the above call stack is Adobe Flex code and the signature of the offending method to the offending line is shown here:


protected function addToFreeItemRenderers(item:IListItemRenderer):void
{
   // trace("addToFreeItemRenderers ", item);

   DisplayObject(item).visible = false;

The error is caused by the item variable having a null value.

The solution we used was found at Tom Van den Eynde RIA Flex Blog entry Exception after TileList resize.

Adding a resize event to the TileList in the complex embedded containers and calling executeBindings() on the TileList object made the problem go away.

Categories
Articles

Actionscript 3 Animating Sprite Rotation Following Mouse Movement

By Lon (Alonzo) Hosford

This my own version of of Keith Peter’s Foundation Actionscript 3.0 Animation: Making Things Move chapter 3 implementation of sprite rotation following a mouse.

Download files
[August 10 2010 – I updated this to an Actionscript project in Flex Builder 4. ]

Keith Peters AS3 Animation
Learn More

You can build this with the free Flex SDK by using the code in the src folder. Same for Flash CS3 and later versions. You need to create a Flash Document in the src folder and set the document class to Chapter03_Rotation_AS3. For your convenience the Flash CS4 example download is included.

This article shows the code for the Flex project.

Application Class – Chapter03_Rotation_Flex
This Flex version is a spark implementation. The SpriteVisualElement component shown on line 51 is used to add the code to the application display on line 31.

<?xml version="1.0" encoding="utf-8"?>
<!--
	Application class for showing sprite rotation following mouse movement. 
	<p>Author: Lon Hosford https://www.lonhosford.com 908 996 3773</p>
    <p>Reference: Keith Peter's Actionscript 3.0 Animation Chapter 3</p>
	
-->
<s:Application xmlns:fx="http://ns.adobe.com/mxml/2009" 
			   xmlns:s="library://ns.adobe.com/flex/spark" 
			   xmlns:mx="library://ns.adobe.com/flex/mx" width="400" height="400"
			   creationComplete="creationCompleteHandler(event)" 
			   viewSourceURL="srcview/index.html">
	<fx:Script>
		<![CDATA[
			import mx.events.FlexEvent;
			
			// Properties for background
			private static const backgroundColor:Number = 0x0000ff;
			private static const backgroundBorderColor:Number = 0x666666;
			private static const backgroundBorderWeight:Number = 2;
			/**
			 * Handler for Application creationComplete event
			 * */
			protected function creationCompleteHandler(event:FlexEvent):void
			{
				// Create an Arrow object
				var arrow:Arrow = new Arrow();
				// Wrap arrow object into a RotateSpriteToMouse object
				var rotateToMouse:RotateSpriteToMouse = new RotateSpriteToMouse(arrow);
				// Add rotateToMouse Sprite to a SpriteVisualElement
				arrowVisualElement.addChild(rotateToMouse);
				// Center the SpriteVisualElement
				arrowVisualElement.x = background_bc.width / 2;
				arrowVisualElement.y = background_bc.height / 2;
			}

		]]>
	</fx:Script>
	<!--- 
	Background for app 
	--> 
	<s:BorderContainer id = "background_bc"
					   width="{width}" height = "{height}"
					   borderWeight="{backgroundBorderWeight}"
					   borderColor="{backgroundBorderColor}"
					   backgroundColor="{backgroundColor}">

		<!--- 
		Spark container for Sprite 
		--> 
		<s:SpriteVisualElement id="arrowVisualElement" />

	</s:BorderContainer>
					   
</s:Application>

[ad name=”Google Adsense”]
RotateSpriteToMouse Class
This is the class that does the work. Listening to the Event.ENTER_FRAME event leads to the update_rotation() method that does the work of updating the rotation.

package
{
	import flash.display.Sprite;
	import flash.events.Event;
	/**
	 * Rotates sprite to mouse position
	 * */
	public class RotateSpriteToMouse extends Sprite
	{
		private var _sprite_to_rotate:Sprite;	// Sprite to rotate to mouse
		/**
		 * Constructor 
		 * @param sprite_to_rotate The sprite to rotate
		 * */
		public function RotateSpriteToMouse(sprite_to_rotate:Sprite)
		{
			_sprite_to_rotate = sprite_to_rotate;
			addChild(_sprite_to_rotate);
			addEventListener(Event.ENTER_FRAME, enterFrameEventHandler);
		}
		/**
		 * The event handler for Event.ENTER_FRAME
		 * */
		private function enterFrameEventHandler(event:Event):void
		{
			update_rotation();
		}
		/**
		 * Updates the rotation of the _sprite_to_rotate
		 * */
		private function update_rotation():void
		{
			// Triangle adjacent angle side distance for the x value.
			var dx:Number = mouseX - _sprite_to_rotate.x;
			// Triangle opposite angle side distance for the y value.
			var dy:Number = mouseY - _sprite_to_rotate.y;
			// Compute angle in radians from the sprite to the mouse position.
			var radians:Number = Math.atan2(dy, dx);
			// Convert radians to degrees
			_sprite_to_rotate.rotation = radians * 180 / Math.PI;
		}
	}
}

Arrow Class
Simple arrow sprite that Keith wrote. Key here is the center registration point.

package
{
	import flash.display.Sprite;
	/**
	 * Creates an arrow sprite with fixed dimensions
	 * */
	public class Arrow extends Sprite
	{
		public function Arrow() 
		{
			draw();
		}
		/**
		 * Draw the arrow
		 * */
		private function draw():void
		{
			graphics.lineStyle(1, 0, 1);
			graphics.beginFill(0xffff00);
			graphics.moveTo(-50, -25);
			graphics.lineTo(0, -25);
			graphics.lineTo(0, -50);
			graphics.lineTo(50, 0);
			graphics.lineTo(0, 50);
			graphics.lineTo(0, 25);
			graphics.lineTo(-50, 25);
			graphics.lineTo(-50, -25);
			graphics.endFill();
		}
	}
	
}
Categories
Articles

Actionscript 3 Animation Following the Mouse to Show Velocity at an Angle

By Lon (Alonzo) Hosford

See also the same done in HTML5 canvas HTML5 Canvas Based Animation Rotate Arrow To Mouse Position

In chapter 5 of Keith Peter’s Foundation Actionscript 3.0 Animation: Making Things Move velocity at an angle is explained. I took Keith’s mouse following example demonstrating velocity at an angle and punched it up a small notch.

Download files
[August 10 2010 – I updated this to an Actionscript project in Flex Builder 4. ]

You can build this with the free Flex SDK by using the code in the src folder. Same for Flash CS3 and later versions. You need to create a Flash Document in the src folder and set the document class to Chapter05_FollowMouse. For your convenience the Flash CS4 example download is included.

Keith Peters AS3 Animation
Learn More

This article shows the code for the Flex project. This Flex version is a spark implementation.

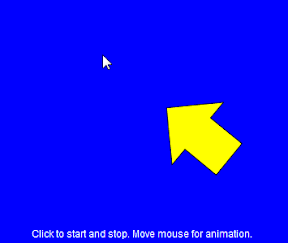
The arrow will follow the mouse around the stage. It will stop following when requested and start again with a mouse click on the stage. It also waits patiently when the mouse leaves the stage. The arrow gets real frustrated when you put the mouse over it. It always points towards the mouse when the mouse is over the stage.

Application Class – Chapter04_SprayPaint
I added user mouse click interaction to control the start and stop movement of the _arrow sprite. See line 40 and lines 48 to 51.

The movement also stops and starts when the mouse enters and leaves the stage. To accomplish that the stage needed to register a Event.MOUSE_LEAVE event to detect the mouse leaving the stage. The stage object is available when the applicationComplete(...) event occurs. The MouseEvent.MOUSE_MOVE sufficed to detect the mouse back over the stage. The _mouseOverStage variable carries the state of the mouse over the stage.

The rotation of the _arrow sprite is continuous. Gives it a mouse awareness state.

<?xml version="1.0" encoding="utf-8"?>
<!--
	Application class to demonstrate animation trigonometry to show velocity at an angle. 
    Mouse position determines the angle. 
	<p>Author: Lon Hosford https://www.lonhosford.com 908 996 3773</p>
    <p>Reference: Keith Peter's Actionscript 3.0 Animation Chapter 5</p>
	
-->
<s:Application xmlns:fx="http://ns.adobe.com/mxml/2009" 
			   xmlns:s="library://ns.adobe.com/flex/spark" 
			   xmlns:mx="library://ns.adobe.com/flex/mx" width="400" height="400"
			   applicationComplete="applicationCompleteHandler(event)"
			   viewSourceURL="srcview/index.html">
	<fx:Script>
		<![CDATA[
			import mx.events.FlexEvent;
			public static const backgroundColor:Number = 0x0000ff;
			public static const backgroundBorderColor:Number = 0x666666;
			public static const backgroundBorderWeight:Number = 2;
			
			private var _instructions_tf:TextField;						// Instructions for user
			[Bindable]
			private var _lang_instructions:String = "Click to start and stop. Move mouse for animation."
			private var _arrow:Arrow;									// Animated sprite is an Arrow 
			private var _speed:Number = 5;								// Movement speed
			private var _allowMoving:Boolean = false;					// Use allowing moving state
			private var _mouseOverStage:Boolean = true;					// Mouse on the stage state
			
			/**
			 * Handler for Application applicationComplete event
			 * */
			protected function applicationCompleteHandler(event:FlexEvent):void
			{
				// Create Arrow object and add to stage. This is animated.
				_arrow = new Arrow();
				arrowVisualElement.addChild(_arrow);
				_arrow.x = (width - _arrow.width ) / 2;
				_arrow.y = (height - _arrow.height ) / 2;
				
				
				stage.addEventListener(MouseEvent.CLICK, mouseClickEventHandler);
				stage.addEventListener(MouseEvent.MOUSE_MOVE, mouseMoveEventHandler);
				stage.addEventListener(Event.ENTER_FRAME, enterFrameEventHandler);
				stage.addEventListener(Event.MOUSE_LEAVE, mouseLeaveEventHandler);
			}
			/**
			 * MouseEvent.CLICK handler
			 * */
			private function mouseClickEventHandler(event:MouseEvent):void
			{
				_allowMoving = !_allowMoving;
			}
			/**
			 * MouseEvent.MOUSE_MOVE handler
			 * */
			private function mouseMoveEventHandler(event:MouseEvent):void
			{
				_mouseOverStage = true;
			}
			/**
			 * Event.MOUSE_LEAVE handler
			 * */
			private function mouseLeaveEventHandler(event:Event):void
			{
				_mouseOverStage = false;
			}
			
			/**
			 * Event.ENTER_FRAME handler
			 * */
			private function enterFrameEventHandler(event:Event):void
			{
				draw();
			}

[ad name=”Google Adsense”]
The draw() method on line 77 updates the animation. The dx and dy variables are the distance from the mouse to the registration point of the _arrow sprite. Radians for the angle are computed using the Math.atan2(...) method. The angle in radians is converted for Actionscript rotation property to degrees. These trigonometry formulas are covered in Keith’s book .

The state the user choose to have the mouse follow is tested and if true the moveTo() method on line 98 computes the velocity at an angle discussed in chapter 5.

The _arrow sprite is designed with a center registration point to facilitate the rotation. As a result the _arrow sprite will move until the mouse coordinates reach the registration point. I added the hitTestPoint(...) method on line 105 to adjust so that the movement stops at the edge of the pixels in the _arrow sprite. The result the _arrow sprite’s point comes very close to the mouse versus the center of the _arrow sprite.

			/**
			 * Draw
			 * */
			private function draw():void
			{		
				// Distance of arrow registration point from mouse
				var dx:Number = mouseX - _arrow.x ;
				var dy:Number = mouseY - _arrow.y ;
				
				// Get angle in radians
				var angle:Number = Math.atan2(dy, dx);
				// Rotate converting radians to degrees
				_arrow.rotation = angle * 180 / Math.PI;
				
				// Is in a mouse following state
				if (_allowMoving)
				{
					// Move based on angle
					moveTo(angle);
				}
			}
			/**
			 * Move arrow
			 * */
			private function moveTo(angle:Number):void
			{
				// Velocity based on angle
				var vx:Number = Math.cos(angle) * _speed;
				var vy:Number = Math.sin(angle) * _speed;
				
				// Mouse position overlaps shape and mouse is over a pixel in the object
				if (!_arrow.hitTestPoint(mouseX, mouseY, true) && _mouseOverStage)
				{
					// Add velocity to position
					_arrow.x += vx ;
					_arrow.y += vy ;
				}
			}
			/**
			 * Set any stage options per your needs
			 * */
			private function initStage():void 
			{
				stage.scaleMode = StageScaleMode.NO_SCALE;
			}
			/**
			 * Instructions for user
			 * */
			private function getInstructions_tf():TextField 
			{
				var tf:TextField = new TextField();
				tf.autoSize = TextFieldAutoSize.LEFT;			
				tf.background = true;
				var textFormat:TextFormat = new TextFormat();
				textFormat.font = "_typewriter";
				tf.defaultTextFormat = textFormat;
				tf.text = _lang_instructions;
				return tf;
			}
		]]>
	</fx:Script>

[ad name=”Google Adsense”]
This part of the application represents the Flex UI based in Spark components.

	<!--- 
	Background for app 
	--> 
	<s:BorderContainer id = "background_bc"
					   width="{width}" height = "{height}"
					   borderWeight="{backgroundBorderWeight}"
					   borderColor="{backgroundBorderColor}"
					   backgroundColor="{backgroundColor}">

		<!--- 
		Spark container for Sprite 
		--> 
		<s:SpriteVisualElement id="arrowVisualElement" />

	</s:BorderContainer>
	<!--- 
	Instructions 
	--> 
	<s:HGroup  horizontalAlign="center" x="0" y="378" width = "100%">
		<s:Label text="{_lang_instructions}" color="0xffffff"/>
	</s:HGroup>
					   
</s:Application>

[ad name=”Google Adsense”]

Categories
Articles

Factory Design Pattern Actionscript 3 Print Center – Sanders & Cumaranatunge – Part 2 of 2

By Lon (Alonzo) Hosford

This is the expanded print center Factory design pattern from chapter 2 of William Sanders and Chandima Cumaranatunge Actionscript 3.0 Design Patterns.

Actionscript 3 Design Patterns Learn More

This is an ActionScript project created in Flex Builder and updated to Flex Builder 4. Download the example code. You can build this with the free Flex SDK by using the code in the src folder. Same for Flash CS3 and CS4. You need to create a Flash Document in the src folder and set the document class to Chapter02_Factory_PrintCenters. For your convenience you can download a Flash CS4 ready to go example.

This includes a basic Actionscript debugger console to display tracing statements on stage. Each class sends messages to the console to show their methods working. These messages help you follow the relationships in the Factory design pattern.

The classes that from part 1 are not repeated. Click here to review them.

Application Class – Chapter02_Factory_PrintCenters
This is the client class. It repeats the client class discussed in part 1 use or the PrintCenter classes. It also access the new HighVolPrinterCenter2 and LowVolPrinterCenter2 classes on line 48 and 54 respectively. These are subclasses of the new PrintCenter2. These are new creator classes that take parameters to determine which IPrintJob classes to select. The original PrintCenter subclasses HighVolPrinterCenter2 and LowVolPrinterCenter2 still remain and still work.

/**
 * Demonstrates a more concrete example of decoupling the client, this file, from the products.
 * In this case the products are print jobs on various printers. The print jobs are not coupled
 * to the client. This example uses parameters for the factory choices.
 * <p>
 * This is part two of the example. Additional IPrintJob classes are added along with a second creator
 * classes that take parameters for the type of printing.
 * </p>
 * */
package
{
	import com.lonhosford.util.debug.lite.DebugConsole;

	import flash.display.Sprite;

	import printcenters.HighVolPrinterCenter;
	import printcenters.HighVolPrinterCenter2;
	import printcenters.LowVolPrinterCenter;
	import printcenters.LowVolPrinterCenter2;
	import printcenters.PrintCenter;
	import printcenters.PrintCenter2;

	// {SET STAGE SIZE AND SPEED HERE}
	[SWF(width=500, height = 300, frameRate = 30)]
	public class Chapter02_Factory_PrintCenters extends Sprite
	{
		private var debugConsole:DebugConsole = DebugConsole.getInstance();
		public function Chapter02_Factory_PrintCenters()
		{
			stage.addChild(debugConsole);
			debugConsole.width = stage.stageWidth;
			debugConsole.height = stage.stageHeight;

			debugConsole.write("Actionscript 3.0 Design Patterns");
			debugConsole.write("William Sanders & Chandima Cumaranatunge");
			debugConsole.write("Chapter 2 Print Centers Example");
			debugConsole.write("\n");

			debugConsole.write("\nPrint LongThesis.doc to high volume printer.");
			var pcHighVol:PrintCenter = new HighVolPrinterCenter();
			pcHighVol.print("LongThesis.doc");

			debugConsole.write("\nPrint ShortVita.doc to low volume printer.");
			var pcLowVol:PrintCenter = new LowVolPrinterCenter();
			pcLowVol.print("ShortVita.doc");

			debugConsole.write("\nPrint LongThesis.doc to high volume BW printer.");
			var pc2HighVol:PrintCenter2 = new HighVolPrinterCenter2();
			pc2HighVol.print("LongThesis.doc", HighVolPrinterCenter2.BW);
			debugConsole.write("\nPrint SalesReport.doc to high volume COLOR printer.");
			pc2HighVol.print("SalesReport.doc", HighVolPrinterCenter2.COLOR);

			debugConsole.write("\nPrint LongThesis.doc to low volume BW printer.");
			var pc2LowVol:PrintCenter2 = new LowVolPrinterCenter2();
			pc2LowVol.print("LongThesis.doc", LowVolPrinterCenter2.BW);
			debugConsole.write("\nPrint SalesReport.doc to low volume COLOR printer.");
			pc2LowVol.print("SalesReport.doc", LowVolPrinterCenter2.COLOR);

		}
	}
}

PrintCenter2 Class
The main change over PrintCenter class is the printType parameter in the print() method on line 17 and the createPrintJob() factory method on line 27. Each PrintCenter2 subclass uses the printType parameter to determine which IPrintJob class to create. This expands the capability of unlimited new IPrintJob classes for any single PrintCenter2 creator class.

package printcenters
{
	import flash.errors.IllegalOperationError;
	/**
	 * Handles file printing. Paramatizes the type of print job.
	 * */
	public class PrintCenter2
	{
		public function PrintCenter2()
		{
		}
		/**
		 * Simulate printing a file.
		 * @param fileName Name of file to print.
		 * @param printType Name of file to print.
		 * */
		public function print(fileName:String, printType:uint):void
		{
			var printjob:IPrintJob = this.createPrintJob(printType);
			printjob.start(fileName);
		}
		/**
		 * Creates the IPrintJob products.
		 * @throws flash.errors.IllegalOperationError Must override in subclass.
		 * @param printType Name of file to print.
		 * */
		protected function createPrintJob(printType:uint):IPrintJob
		{
			throw new IllegalOperationError("PrintCenter2.createPrintJob() - override in subclass");
			return null;
		}
	}
}

HighVolPrintCenter2 Class
The key change over the HighVolPrintCenter class are the BW and COLOR constants on line 10 and 11 respectively. These are the printType parameter values for selecting the IPrintJob class to use.

The createPrintJob() function on line 23 uses the code>BW and COLOR constants to select the WorkgroupPrintJob and the new ColorLaserPrintJob product classes. Any other parameter throws an Error.

package printcenters
{
	import com.lonhosford.util.debug.lite.Debugger;
	/**
	 * HighVolPrinterCenter creator class
	 * */
	public class HighVolPrinterCenter2 extends PrintCenter2
	{
		private var debugger:Debugger = Debugger.getInstance();
		public static const BW:uint = 0;
		public static const COLOR:uint = 1;
		public function HighVolPrinterCenter2()
		{
			debugger.write("HighVolPrinterCenter2() - This is a creator.")
		
		}
		/**
		 * Create IPrintJob object.
		 * @param printType Name of file to print.
		 * @return ColorLaserPrintJob | WorkgroupPrintJob based on printType
		 * @throws Error When printType is not matched.
		 * */
		override protected function createPrintJob(printType:uint):IPrintJob
		{
			
			if (printType == BW)
			{
				debugger.write("HighVolPrinterCenter2.createPrintJob() - BW");
				return new WorkgroupPrintJob();
			}
			else if (printType == COLOR)
			{
				debugger.write("HighVolPrinterCenter2.createPrintJob() - COLOR");
				return new ColorLaserPrintJob();
				
			}
			else
			{
				throw new Error("HighVolPrinterCenter2.createPrintJob() - Invalid printer kind.");
				return null;
			}
			
		}
	}
}

LowVolPrintCenter2 Class
This mimics the HighVolPrintCenter2 class. The InkJetPrintJob and the new ColorInkjetPrintJob product classes are selected by the printerType parameter supplied to the createPrintJob(...) function on line 23. Lines 10 and 11 contain valid values for the printerType parameter.

package printcenters
{
	import com.lonhosford.util.debug.lite.Debugger;
	/**
	 * LowVolPrinterCenter creator class
	 * */
	public class LowVolPrinterCenter2 extends PrintCenter2
	{
		private var debugger:Debugger = Debugger.getInstance();
		public static const BW:uint = 0;
		public static const COLOR:uint = 1;
		public function LowVolPrinterCenter2()
		{
			debugger.write("LowVolPrinterCenter2() - This is a creator.")
		
		}
		/**
		 * Create IPrintJob object.
		 * @param printType Name of file to print.
		 * @return InkJetPrintJob | ColorInkjetPrintJob based on printType
		 * @throws Error When printType is not matched.
		 * */
		override protected function createPrintJob(printType:uint):IPrintJob
		{
			
			if (printType == BW)
			{
				debugger.write("LowVolPrinterCenter2.createPrintJob() - BW");
				return new InkJetPrintJob();
			}
			else if (printType == COLOR)
			{
				debugger.write("LowVolPrinterCenter2.createPrintJob() - COLOR");
				return new ColorInkjetPrintJob();
				
			}
			else
			{
				throw new Error("LowVolPrinterCenter2.createPrintJob() - Invalid low volume print type.");
				return null;
			}
			
		}
	}
}

[ad name=”Google Adsense”]
There are some new IPrintJob classes introduced. They simulate newer types of products available to the creator classes.

ColorLaserPrintJob Class
Nothing unusual here. Just another IPrintJob class.

package printcenters
{
	import com.lonhosford.util.debug.lite.Debugger;
	/**
	 * ColorLaserPrintJob product class
	 * */
	internal class ColorLaserPrintJob implements IPrintJob
	{
		private var debugger:Debugger = Debugger.getInstance();
		public function ColorLaserPrintJob()
		{
			debugger.write("ColorLaserPrintJob()")
		}
		/**
		 * Simulate starting an ColorInkjetPrintJob
		 * @param fileName Name of file to print.
		 * */		
		public function start(fileName:String):void
		{
			debugger.write("ColorLaserPrintJob.start() - fileName:" + fileName);
		}
	}
}

ColorInkjetPrintJob Class
Another IPrintJob class. They can be pounded out. Anyone want to make a dot matrix print job?

package printcenters
{
	import com.lonhosford.util.debug.lite.Debugger;
	/**
	 * ColorInkjetPrintJob product class
	 * */
	internal class ColorInkjetPrintJob implements IPrintJob
	{
		private var debugger:Debugger = Debugger.getInstance();
		public function ColorInkjetPrintJob()
		{
			debugger.write("ColorInkjetPrintJob()")
		}
		/**
		 * Simulate starting an ColorInkjetPrintJob
		 * @param fileName Name of file to print.
		 * */		
		public function start(fileName:String):void
		{
			debugger.write("ColorInkjetPrintJob.start() - fileName:" + fileName);
		}
	}
}
Categories
Articles

Factory Design Pattern Minimalist Example For Actionscript 3 – Sanders & Cumaranatunge

By Lon (Alonzo) Hosford

This is the minimalist Factory design pattern from chapter 2 of William Sanders and Chandima Cumaranatunge Actionscript 3.0 Design Patterns

Actionscript 3 Design Patterns Learn More

This is an ActionScript project created in Flex Builder and updated to Flex Builder 4. Download the example code. You can build this with the free Flex SDK by using the code in the src folder. Same for Flash CS3 and CS4. You need to create a Flash Document in the src folder and set the document class to Chapter02_Factory_Minimalist_Flash. For your convenience you can download a Flash CS4 ready to go example.

This includes a basic Actionscript debugger console to display tracing statements on stage. Each class sends messages to the console to show their methods working. These messages help you follow the relationships in the Factory design pattern.

Application Class – Chapter02_Factory_Minimalist
This is the client class. The class simply instantiates CreatorA and CreatorB classes and calls the doStuff() method they inherit from the Creator class. The basic idea is that the ProductA and ProductB classes are uncoupled from the client. Uncoupling is a good OOP design principle.

/**
 * Demonstrates a minimalist example of decoupling the client, this file, from the products.
 * The product classes may be modified within the package and the creators maintain the
 * direct interface to the clients.
 * */
package
{
	import com.lonhosford.util.debug.lite.DebugConsole;
	import com.lonhosford.util.debug.lite.DebugMessage;
	import com.lonhosford.util.debug.lite.Debugger;
	import com.lonhosford.util.debug.lite.DebuggerEvent;

	import flash.display.Sprite;

	import example.CreatorA;
	import example.CreatorB;

	// {SET STAGE SIZE AND SPEED HERE}
	[SWF(width=500, height = 300, frameRate = 30)]

	public class Chapter02_Factory_Minimalist extends Sprite
	{
		private var debugConsole:DebugConsole = DebugConsole.getInstance();
		private static const backgroundColor:Number = 0xffffff;
		private static const backgroundBorderColor:Number = 0x666666;
		private static const backgroundBorderWidth:Number = 2;

		public function Chapter02_Factory_Minimalist()
		{

			stage.addChild(debugConsole);
			debugConsole.width = stage.stageWidth;
			debugConsole.height = stage.stageHeight;

			debugConsole.write("Actionscript 3.0 Design Patterns");
			debugConsole.write("William Sanders & Chandima Cumaranatunge");
			debugConsole.write("Chapter 2 Factory Minimalist Example");
			debugConsole.write("\n");

			var ca:CreatorA = new CreatorA();
			var cb:CreatorB = new CreatorB();

			ca.doStuff();
			cb.doStuff();
		}
	}
}

Creator Class
This class provides a “factory method” interface to each of the subclasses. The line 16 shows the factoryMethod() method. The method name for the example emphasizes its purpose. The factory method cannot be called from a client class. The method throws an IllegalOperationError to prevent that coding option.

[ad name=”Google Adsense”]
The factoryMethod() method returns a IProduct class. Each Creator subclass will return its own product all having a manipulate() method defined by the IProduct interface discussed later in this post. This Creator class then uses the product class manipulate() method on line 13.

package example
{
	import flash.errors.IllegalOperationError;

	public class Creator
	{
		public function Creator()
		{
		}
		public function doStuff():void
		{
			var product:IProduct = this.factoryMethod(); // this is SubClass CreatorA, CreatorB etc
			product.manipulate();

		}
		protected function factoryMethod():IProduct
		{
			throw new IllegalOperationError("Creator.factoryMethod() - Abstract method. Override in subclass");
			return null;
		}
	}
}

CreatorA Class
This is a class the client classes use. The Creater super class contains the doStuff() method clients use to interact with the product classes.

package example
{
	import com.lonhosford.util.debug.lite.DebugConsole;

	public class CreatorA extends Creator
	{
		private var debugConsole:DebugConsole = DebugConsole.getInstance();
		public function CreatorA()
		{
			debugConsole.write("CreatorA()");
		}
		override protected function factoryMethod():IProduct
		{
			debugConsole.write("CreatorA.factoryMethod() - creating Product1");
			return new Product1();
		}
	}
}

CreatorB Class

package example
{
	import com.lonhosford.util.debug.lite.DebugConsole;

	public class CreatorB extends Creator
	{
		private var debugConsole:DebugConsole = DebugConsole.getInstance();
		public function CreatorB()
		{
			debugConsole.write("CreatorB()");
		}
		override protected function factoryMethod():IProduct
		{
			debugConsole.write ("CreatorB.factoryMethod() - creating Product2");
			return new Product2();
		}
	}
}

[ad name=”Google Adsense”]
IProduct Interface
This interface provides a common manipulate() method for the Creator class, and all its subclasses, in the package. Each product class implements this interface.

package example
{
	public interface IProduct
	{
		function manipulate():void;
	}
}

Product1 Class
This is the worker bee class. It must implement the manipulate() method of the IProduct interface. The Creator class uses this method in its doStuff() method. Remember the doStuff() method is how client classes interact with the products.

package example
{
	import com.lonhosford.util.debug.lite.DebugConsole;

	internal class Product1 implements IProduct
	{
		private var debugConsole:DebugConsole = DebugConsole.getInstance();
		public function Product1()
		{
			debugConsole.write("Product1()");
		}
		public function manipulate():void
		{
			debugConsole.write("Product1.manipulate()");
		}
	}
}

Product2 Class

package example
{
	import com.lonhosford.util.debug.lite.DebugConsole;

	internal class Product2 implements IProduct
	{
		private var debugConsole:DebugConsole = DebugConsole.getInstance();
		public function Product2()
		{
			debugConsole.write("Product2()");
		}
		public function manipulate():void
		{
			debugConsole.write("Product2.manipulate()");
		}
	}
}