Categories
Articles

Adobe Peer to Peer Basic Example For Connecting to Stratus Server

By Lon Hosford

This is the bare bones example to set up a Flex application for connecting to the Adobe Stratus Server and obtaining a unique 256-bit peer id.

[ad name=”Google Adsense”]

The peer id is shared with others using the application for communication as well as their peer id shared with you. This example does not go into those steps but basically you need a means to do that such as using the FMS server or any web server.

The Adobe Stratus Server handles the peer id handshaking between the peer to peer members. The data such as video or files are shared directly between he peers. The Adobe Stratus server is free and various bloggers have indicated its future is becoming part of the FMS server product. You can use the Adobe Stratus server by obtaining a developer key at Adobe Labs. Insert that key in the code at line 16.

This is the code for an Air application which can also be used for a Flex application.

.
.
.
<?xml version="1.0" encoding="utf-8"?>
<!-- Bare bones Adobe Stratus P2P connection and retrieval of an id -->
<s:WindowedApplication xmlns:fx="http://ns.adobe.com/mxml/2009"
			   xmlns:s="library://ns.adobe.com/flex/spark"
			   xmlns:mx="library://ns.adobe.com/flex/mx"
			   creationComplete="creationCompleteHandler(event)">

	<fx:Script>
		<![CDATA[
			import mx.events.FlexEvent;

			private const SERVER:String = "rtmfp://stratus.adobe.com/";
			private const DEVKEY:String = "{YOUR ADOBE STRATUS DEVELOPER KEY}";
			private var stratusConnection:NetConnection;
			protected function creationCompleteHandler(event:FlexEvent):void
			{
				console("============================================");
				console("This is a bare bones example of connecting ");
				console("to the adobe status peer to peer server ");
				console("and obtaining an id. ");
				console("============================================");
				console("creationCompleteHandler") ;

				stratusConnection = new NetConnection();
				stratusConnection.addEventListener(NetStatusEvent.NET_STATUS, stratusConnectionStatusHandler);
				stratusConnection.connect(SERVER+DEVKEY);
			}

			private function stratusConnectionStatusHandler(event:NetStatusEvent):void{
				console("stratusConnectionStatusHandler - event.info.code:" + event.info.code);

				switch (event.info.code)
				{
					case "NetConnection.Connect.Success":
						console("stratusConnectionStatusHandler - nearID:" + stratusConnection.nearID);
						break;
					case "NetConnection.Connect.Failed":
						console("stratusConnectionStatusHandler - connection failed");
						break;
					default:
						console("stratusConnectionStatusHandler - uncaught event.info.code");
						break;
				}
			}
			private function console(msg:String):void
			{
				trace(msg);
				out_ta.appendText(msg + "\n");

			}

		]]>
	</fx:Script>

	<s:TextArea id = "out_ta"
				width = "100%" height = "100%"
				lineBreak="explicit"
				fontFamily="_typewriter"/>
</s:WindowedApplication>

Categories
Articles

Flex 4 HScrollBar or VScrollBar: How to Autohide like Scroller

By Lon Hosford

[ad name=”Google Adsense”]

There are skinning situations you want to simply use the HScrollBar or VScrollBar to handle the scrolling. For example using multiple Scroller components to handle overlapping viewports. That scenario might include a horizontal scroll bar for a TextArea but a vertical scroll bar for the container.

One drawback is that HScrollBar and VScrollBar do not autohide the scroll bars until they are needed for scrolling. The Scroller component does autohide. If the Scroller cannot handle the need such as overlapping viewports, then resorting to HScrollBar and VScrollBar with or without the Scroller may be a possible solution.

A method to handle this is to use the contentWidth and contentHeight properties for a viewport such as the Group component.

.
.
/*

Assume the viewport is a Group or like component with an id of viewportId.
This optionally sets the width to the viewport which may not be needed depending on layout..
*/
<s:HScrollBar  viewport="{viewportId}"  width="{viewportId.width}"  visible="{viewportId.contentWidth > viewportId.width}"   />

/*
Assume the viewport is a Group or like component with an id of viewportId.
This optionally sets the height to the viewport which may not be needed depending on layout.
*/
<s:VScrollBar  viewport="{viewportId}"  height="{viewportId.width}"  visible="{viewportId.contentHeight > viewportId.height}"   />
.
.
Categories
Articles

Actionscript 3.0 Debug Console Lite

By Lon (Alonzo) Hosford

I created this debug console for use in learning and teaching Actionscript programming. This is developed in pure Actionscript without component libraries. For that reason it can be used in Flash, AIR, and Flex. It will work in Flash IDE like Flash CS4 or Flex Builder. It also works creating Flash, Flex or AIR from the Flex SDK command line.

[ad name=”Google Adsense”]

The debug console plays in the published movie. It also outputs the results to the consoles in the respective IDEs: Flex Builder, Flash CS4, etc. You can turn that feature off and make the DebugConsole invisible when you publish if you wish.

This is an ActionScript project created in Flex Builder and updated to Flex Builder 4. Download the example code. You can build this with the free Flex SDK by using the code in the src folder. Same for Flash CS3 and CS4. You need to create a Flash Document in the src folder and set the document class to DebuggerLite.

If you want to use the DebugConsole in a Flash CS4 or CS3 you do not need to set the document class to DebuggerLite. Rather in Actionscript you include this code:

import com.lonhosford.util.debug.lite.DebugConsole
var debugConsole:DebugConsole = DebugConsole.getInstance();
stage.addChild(debugConsole);
debugConsole.width = 200;
debugConsole.height = 200;
debugConsole.write("Hello World");

For your convenience you can download a Flash CS4 ready to go example.

Testing Application In Flex Builder
This is a testing Actionscript application in Flex Builder. No Flash or Flex components are used so there is not need to import libraries. The DebugConsole class is instantiated as _debugConsole on line 23. It is a singleton design pattern so only one exists for the application.

A Timer is used to generate entries to the DebugConsole. The Timer is instantiated on line 24 as _testTimer.

The _testTimeCount variable is used to determine how many generated entries to the DebugConsole. General purpose is to see when vertical scroll bar appears.

The _showWideLineAt variable on line 25 is used add a very wide line of text to trip showing the horizontal scroll bar. The _showWideLineAt variable trips this when it equal _testTimer.currentCount value.

The _testTimeDelay variable on line 26 is the millisecond value for the _testTimer. Just depends on how fast you want to see the automated updates to the DebugConsole.

/**
 *  Purpose: Test Debugger Lite
	<p>Author: Lon Hosford www.lonhosford.com 908 996 3773</p>
	<p>Date: March 12, 2010</p>
 * */
package
{
	import com.lonhosford.util.debug.lite.DebugConsole;
	
	import flash.display.Sprite;
	import flash.events.KeyboardEvent;
	import flash.events.TimerEvent;
	import flash.ui.Keyboard;
	import flash.utils.Timer;
	
	[SWF(width=500, height = 300, frameRate = 30)]
	/**
	 * Testing application for DebugConsole.
	 * @see com.lonhosford.util.debug.lite.DebugConsole  
	 * */
	public class DebuggerLite extends Sprite
	{
		private var _debugConsole:DebugConsole = DebugConsole.getInstance();
		private var _testTimeCount:Number = 15; 
		private var _showWideLineAt:Number = 2; 
		private var _testTimeDelay:Number = 250; 
		private var _testTimer:Timer; 
		public function DebuggerLite()
		{
			stage.addChild(_debugConsole);
			_debugConsole.width = stage.stageWidth;
			_debugConsole.height = stage.stageHeight;
			
			_testTimer = new Timer(_testTimeDelay,_testTimeCount); 
			_testTimer.addEventListener(TimerEvent.TIMER,testTimerEventHandler);
			_testTimer.addEventListener(TimerEvent.TIMER_COMPLETE,testTimerCompleteEventHandler);
			stage.addEventListener(KeyboardEvent.KEY_UP, stageKeyUpEventHandler);
			start();
		
		}
		/**
		 * Starts the automated testing.
		 * */
		private function start():void
		{
		_debugConsole.write("Debugger Lite Tester");
		_debugConsole.write("Hit Space Bar to Clear.");
		_debugConsole.write("Hit Ctr+ Space Bar to Repeat.");
		_debugConsole.write("\n");
		_testTimer.start();
			
		}
		/**
		 * Handles the KeyboardEvent.KEY_UP event for the stage.
		 * */
		private function stageKeyUpEventHandler(event:KeyboardEvent):void 
		{
			// Space bar
			if ( event.keyCode == Keyboard.SPACE )
			{
				// Control key
				if (event.ctrlKey)
				{
					_testTimer.stop();
					_testTimer.reset();
					_debugConsole.clear();
					start();
				}
				// No control key
				else
				{
					_debugConsole.clear();
				}
				
			}
		}
		/**
		 * Handles the TimerEvent.TIMER event.
		 * */
		private function testTimerEventHandler(event:TimerEvent):void 
		{
			_debugConsole.write(new Date().toTimeString());
			if (_testTimer.currentCount == _showWideLineAt)
			{
				_debugConsole.write("START Lorem ipsum dolor sit amet, consectetur adipisicing elit, sed do eiusmod tempor incididunt ut labore et dolore magna aliqua. Ut enim ad minim veniam, quis nostrud exercitation ullamco laboris nisi ut aliquip ex ea commodo consequat. END");
				
			}
		}
		/**
		 * Handles the TimerEvent.TIMER_COMPLETE event.
		 * */
		private function testTimerCompleteEventHandler(event:TimerEvent):void 
		{
			_debugConsole.write("LAST LINE");
		}
	}
}

[ad name=”Google Adsense”]
DebugConsole Class
This is the DebugConsole class. It is a singleton and as such can be instantiated anywhere in your code to use the write() method on line 291. The DebugConsole write() method calls the Debugger class write()method. The Debugger class write()method dispatches a DebuggerEvent.WRITE which the DebugConsole listens in the consoleUpdate() on line 308. For this reason you can also instantiate the Debugger class in code and use its write() method if you prefer. You only need to instantiate the DebugConsole where you intend to add it to your display.

package com.lonhosford.util.debug.lite
{
	import flash.display.Sprite;
	import flash.events.Event;
	import flash.events.MouseEvent;
	import flash.text.TextField;
	import flash.text.TextFieldAutoSize;
	import flash.text.TextFormat;
	import flash.text.TextFormatAlign;
	
	/**
	 *  UI for debug.lite package
	 * */
	public class DebugConsole extends Sprite
	{
		private static var _instance:DebugConsole;					// Singleton instance
		private var _debugger:Debugger;								
		private var _content_tf:TextField;							// The console content
		private var _lineCount_tf:TextField;						// The line count					
		private var _width:Number = 0;								// Width
		private var _height:Number = 0;								// Height
		private var _scrollVContainer:Sprite;						// Vertical scroller container
		private var _scrollHContainer:Sprite;						// Horizontal scroller container
		private var _scrollLeftButton:DebugConsoleArrowButton;		// Scroll left button
		private var _scrollRightButton:DebugConsoleArrowButton;		// Scroll right button
		private var _scrollUpButton:DebugConsoleArrowButton;		// Scroll up button
		private var _scrollDownButton:DebugConsoleArrowButton;		// Scroll down button
		private var _horizontalScrollIncrement:int = 10;			// Character count increment for horizontal scrolling
		private var _verticalScrollIncrement:int = 1;				// Line count increment for vertical scrolling.
		private var _autoScroll:Boolean = true;						// Autoscroll to last line
		
		/**
		 *  Constructor
		 * 
		 * @param pvt Enforces a singleton pattern.
		 * @see #getInstance() 
		 * */
		public function DebugConsole(pvt:DebugConsolePrivateClass)
		{
			_content_tf = new TextField();
			_lineCount_tf = new TextField();
			
			var format:TextFormat = new TextFormat();
			format.font = "_typewriter";
			format.color = 0x000000;
			format.size = 12;
			format.indent = 2;
			_content_tf.defaultTextFormat = format;
			_content_tf.background= true;
			_content_tf.backgroundColor = 0xffffff;
			
			var format2:TextFormat = new TextFormat();
			format2.font = "_typewriter";
			format2.color = 0x000000;
			format2.size = 12;
			format2.leftMargin = 1
			format2.align = TextFormatAlign.RIGHT;
			//format2.indent = 1;
			
			_lineCount_tf.defaultTextFormat = format2;
			_lineCount_tf.background= true;
			_lineCount_tf.backgroundColor = 0xcccccc;
	
			_content_tf.addEventListener(Event.SCROLL, _console_tfScrollHandler);

			_scrollHContainer = new Sprite();
			_scrollVContainer = new Sprite();
			
			_scrollLeftButton = new DebugConsoleArrowButton();
			_scrollLeftButton.addEventListener(MouseEvent.CLICK,scrollLeftButtonMouseClick);
			_scrollRightButton = new DebugConsoleArrowButton();
			_scrollRightButton.addEventListener(MouseEvent.CLICK,scrollRightButtonMouseClick);
			
			_scrollUpButton = new DebugConsoleArrowButton();
			_scrollUpButton.addEventListener(MouseEvent.CLICK,scrollUpButtonMouseClick);
			_scrollDownButton = new DebugConsoleArrowButton();
			_scrollDownButton.addEventListener(MouseEvent.CLICK,scrollDownButtonMouseClick);
			
			addChild(_content_tf);
			addChild(_lineCount_tf);
			addChild(_scrollHContainer);
			addChild(_scrollVContainer);
			_scrollHContainer.addChild(_scrollLeftButton);
			_scrollHContainer.addChild(_scrollRightButton);
			_scrollVContainer.addChild(_scrollUpButton);
			_scrollVContainer.addChild(_scrollDownButton);
			_debugger = Debugger.getInstance();
			_debugger.addEventListener(DebuggerEvent.WRITE,consoleUpdate);
			
		}
		/**
		 * Singleton instantiation method
		 * */
		public static function getInstance():DebugConsole
		{
			if (DebugConsole._instance == null)
			{
				DebugConsole._instance = new DebugConsole(new DebugConsolePrivateClass());
			}
			return DebugConsole._instance;
		}
		/**
		 * Redraws the components
		 * */
		private function draw():void
		{
			var rightPanelHeight:Number;
			var bottomPanelWidth:Number;
			var lineCount_tf_width:Number = _lineCount_tf.textWidth + 12;// Extra for TextField overhead
			var bottomPanelHeight:Number = 20;
			var rightPanelWidth:Number = 20;
				
			var tfHeight:Number;// = _height;
			var tfWidth:Number = _width;
			// Component border
			graphics.clear();
			graphics.beginFill(0xffffff);
			graphics.lineStyle(2, 0x000000);
			graphics.drawRect(0, 0, _width, _height);
			graphics.endFill();
			_scrollLeftButton.draw(
				bottomPanelHeight,
				bottomPanelHeight,
				0x00ffff,
				1,
				0x000000,
				0x666666,
				90
			);
			_scrollRightButton.draw(
				bottomPanelHeight,
				bottomPanelHeight,
				0x00ffff,
				1,
				0x000000,
				0x666666,
				-90
			);
			
			_scrollUpButton.draw(
				rightPanelWidth,
				rightPanelWidth,
				0x00ffff,
				1,
				0x000000,
				0x666666,
				0
			);
			_scrollDownButton.draw(
				rightPanelWidth,
				rightPanelWidth,
				0x00ffff,
				1,
				0x000000,
				0x666666,
				180
			);
			tfHeight = height
			rightPanelHeight = height-3;
			bottomPanelWidth = width - 3 - lineCount_tf_width;
			if (_content_tf.textHeight > _content_tf.height)
			{
				bottomPanelWidth -= rightPanelWidth - 1;
			}
			if (_content_tf.textWidth > _content_tf.width)
			{
				rightPanelHeight -= bottomPanelHeight - 1;
			}
			// Right scrollbar panel
			if (_content_tf.textHeight > _content_tf.height)
			{
				_scrollUpButton.x = 0;
				_scrollUpButton.y = 0;
				_scrollDownButton.x = 0;
				_scrollDownButton.y = 0;
				_scrollVContainer.graphics.clear();
				
				_scrollVContainer.graphics.beginFill(0xcccccc);
				_scrollVContainer.graphics.lineStyle(1, 0x000000);
				_scrollVContainer.graphics.drawRect(0, 0, rightPanelWidth - 1, rightPanelHeight);
				_scrollVContainer.graphics.endFill();
				_scrollVContainer.x = _width - _scrollVContainer.width + .5;
				_scrollVContainer.y = .5;

				
				_scrollDownButton.x = (_scrollVContainer.width - _scrollDownButton.width) ;
				_scrollDownButton.y = (_scrollVContainer.height - _scrollDownButton.height) ;
				_scrollUpButton.x = _scrollDownButton.x;
				_scrollUpButton.y = 0;
				
				tfWidth -= _scrollVContainer.width - 1;
				
				_scrollVContainer.visible = true;
			}
			else
			{
				_scrollVContainer.visible = false;
			}
			// Bottom scrollbar panel
			if (_content_tf.textWidth > _content_tf.width)
			{
				_scrollLeftButton.x = 0;
				_scrollLeftButton.y = 0;
				_scrollRightButton.x = 0;
				_scrollRightButton.y = 0;
				_scrollHContainer.graphics.clear();
				_scrollHContainer.graphics.beginFill(0xcccccc);
				_scrollHContainer.graphics.lineStyle(1, 0x000000);
				_scrollHContainer.graphics.drawRect(0, 0, bottomPanelWidth, bottomPanelHeight - 1);
				_scrollHContainer.graphics.endFill();
				_scrollHContainer.y = _height - _scrollHContainer.height + .5;
				_scrollHContainer.x = lineCount_tf_width;
				_scrollLeftButton.x = (_scrollHContainer.width - _scrollLeftButton.width) ;
				_scrollLeftButton.y = (_scrollHContainer.height - _scrollLeftButton.height) ;
				_scrollRightButton.x = 0;
				_scrollRightButton.y = _scrollLeftButton.y;

				_scrollHContainer.visible = true;
				tfHeight -= _scrollHContainer.height -1;
			}
			else
			{
				_scrollHContainer.visible = false;
			}
			
			// Left bottom rectangle if horizontal and vertical scroll bars are visible.
			if (_scrollHContainer.visible && _scrollVContainer.visible)
			{
				graphics.beginFill(0xcccccc);
				graphics.lineStyle(0, 0x000000,0);
				graphics.drawRect(_scrollHContainer.x + _scrollHContainer.width, _scrollVContainer.height, bottomPanelHeight-2, bottomPanelHeight-2);
				graphics.endFill();
			}
			// Left bottom rectangle if horizontal scroll bar is visible.
			if (_scrollHContainer.visible)
			{
				graphics.beginFill(0xcccccc);
				graphics.lineStyle(1, 0x000000,100);
				graphics.drawRect( 0, _scrollHContainer.y, lineCount_tf_width, bottomPanelHeight-1);
				graphics.endFill();
			}
			
			// Position and resize line count text field.
			_lineCount_tf.width = lineCount_tf_width;	
			_lineCount_tf.height = tfHeight - 4;			
			_lineCount_tf.x = 1;
			_lineCount_tf.y = 1;
			
			_lineCount_tf.scrollV = _content_tf.scrollV;
			
			// Position and resize line content text field.
			_content_tf.width = tfWidth - 2 - lineCount_tf_width;
			_content_tf.height = _lineCount_tf.height;
			_content_tf.x = _lineCount_tf.x + _lineCount_tf.width ;
			_content_tf.y = _lineCount_tf.y;
			
			_scrollUpButton.enabled =  _content_tf.scrollV != 1;
			_scrollDownButton.enabled =  _content_tf.scrollV != _content_tf.maxScrollV;
			_scrollLeftButton.enabled =  _content_tf.scrollH != _content_tf.maxScrollH;
			_scrollRightButton.enabled =  _content_tf.scrollH != 0;
		}
		/**
		 * Change width
		 * */
		override public function set width(width:Number):void
		{
			_width = width;
			draw();
		}
		/**
		 * Change height
		 * */
		override public function set height(height:Number):void
		{
			_height = height;
			draw();
			
		}
		/**
		 * Scroll to last line. 
		 * @default true  
		 * */
		public function set autoScroll(autoScrollEnabled:Boolean):void
		{
			_autoScroll = autoScrollEnabled;
		}
		/**
		 * Adds one line. Multiple lines can be added inserting \n. A blank line can be added with \n.
		 * <p>The writing is delegated to the Debugger class.</p>
		 * @see com.lonhosford.util.debug.lite.Debugger.write()
		 * */
		public function write(msg:String):void 
		{
			_debugger.write(msg);
		}
		/**
		 * Clears the display. Line count is not reset to 0 and continues to increment.
		 * */
		public function clear():void 
		{
			_lineCount_tf.text = "";
			_content_tf.text = "";
			draw();
		}
		/**
		 * Handles the DebuggerEvent.WRITE event.
		 * */
		private function consoleUpdate(e:DebuggerEvent):void
		{
			var debugMessage:DebugMessage = e.debugMessage;
			
			_lineCount_tf.appendText(debugMessage.lineNumber + "." + "\n");
			if (debugMessage.text == "\n")
			{
				debugMessage.text = "";
			}
			_content_tf.appendText( debugMessage.text + "\n");
			if(_autoScroll)
			{
				_content_tf.scrollV = _content_tf.maxScrollV;
			}			
			draw();
		}
		/**
		 * Handler for the scrollUpButton MouseEvent.CLICK event.
		 * */

		private function scrollUpButtonMouseClick(e:MouseEvent):void
		{
			if (_content_tf.scrollV <= _verticalScrollIncrement)
			{
				_content_tf.scrollV = 1;
			}
			else
			{
				_content_tf.scrollV -= _verticalScrollIncrement;
			}
			draw();
		}
		/**
		 * Handler for the scrollRightButton MouseEvent.CLICK event.
		 * */
		private function scrollRightButtonMouseClick(e:MouseEvent):void
		{
			if (_content_tf.scrollH <= _horizontalScrollIncrement)
			{
				_content_tf.scrollH = 0;
			}
			else
			{
				_content_tf.scrollH -= _horizontalScrollIncrement;
			}
			draw();
		}
		/**
		 * Handler for the scrollDownButton MouseEvent.CLICK event.
		 * */
		private function scrollDownButtonMouseClick(e:MouseEvent):void
		{
			
			if (_content_tf.scrollV + _verticalScrollIncrement >= _content_tf.maxScrollV)
			{
				_content_tf.scrollV = _content_tf.maxScrollV;
				
			}
			else
			{
				_content_tf.scrollV += _verticalScrollIncrement;
			}
			draw();
		}
		/**
		 * Handler for the scrollLeftButton MouseEvent.CLICK event.
		 * */
		private function scrollLeftButtonMouseClick(e:MouseEvent):void
		{
			
			if (_content_tf.scrollH + _horizontalScrollIncrement >= _content_tf.maxScrollH)
			{
				_content_tf.scrollH =_content_tf.maxScrollH;
				
			}
			else
			{
				_content_tf.scrollH += _horizontalScrollIncrement;
			}
			draw();
		}
		/**
		 * Handler for the _content_tf Event.SCROLL event.
		 * */
		public function _console_tfScrollHandler(event:Event):void
		{
			draw();
		}
	}
}
/**
 * Singleton enforcer class
 * */
class DebugConsolePrivateClass
{
	public function DebugConsolePrivateClass()
	{
		
	}
}

Debugger Class
This class receives write messages and dispatches them. It also will write to the IDE debug console on line 60.

package com.lonhosford.util.debug.lite
{
	import flash.events.EventDispatcher;
	/**
	 * Singleton for receiving and dispatching debugging messages
	 * */
	public class Debugger extends EventDispatcher
	{
		private static var _instance:Debugger;
		private var _msg:String;
		private var _isTracing:Boolean = true;		// State of using the trace() function.
		private var _lineCount:Number = 0;			// Line count of tracing messages
		private var _lang_productName:String = "Actionscript 3 Debugger Lite";
		private var _lang_productVersion:String = "Version";
		/**
		 *  Constructor
		 * 
		 * @param pvt Enforces a singleton pattern.
		 * @see #getInstance() 
		 * */
		public function Debugger(pvt:DebuggerPrivateClass)
		{
		}
		/**
		 * Singleton instantiation method
		 * */
		public static function getInstance():Debugger
		{
			if (Debugger._instance == null)
			{
				Debugger._instance = new Debugger(new DebuggerPrivateClass());
			}
			return Debugger._instance;
		}
		/**
		 * Turns on or off tracing to the Flash or Flex IDE console.
		 * @default true
		 * */
		public function set isTracing(value:Boolean):void
		{
			_isTracing = value;
		}
		/**
		 * Adds one line. Multiple lines can be added inserting \n. A blank line can be added with \n.		 * <p>The writing is delegated to the Debugger class.</p>
		 * */
		public function write(msg:String):void 
		{
			var messageLines:Array = new Array();
			if (msg == "\n") 
			{
				messageLines.push("");
			}
			else
			{
				messageLines = msg.split("\n")
			}
			
			
			if (_isTracing)
			{
				trace(msg);
			}
			if ( _lineCount == 0 )
			{
				messageLines.splice(0,0,_lang_productName + "\t" + _lang_productVersion + " " + DebugVersion.VERSION);
				messageLines.splice(1,0, DebugVersion.AUTHOR + "\t" + DebugVersion.AUTHOR_WEB_SITE);
				messageLines.splice(2,0,"\n");
			}
			for (var msgLinesIndex:uint = 0; msgLinesIndex <= messageLines.length - 1; msgLinesIndex++)
			{
				dispatchMessageEvent(messageLines[msgLinesIndex]);
			}
		}
		/**
		 * Dispatches a DebuggerEvent.WRITE
		 * @see DebuggerEvent
		 * @see DebugMessage
		 * */
		private function dispatchMessageEvent(msg:String):void
		{
			var debugMessage:DebugMessage = new DebugMessage();
			debugMessage.text = msg;
			debugMessage.lineNumber = ++_lineCount;
			var e:DebuggerEvent = new DebuggerEvent(DebuggerEvent.WRITE,  debugMessage);
			dispatchEvent(e);
		}
	}
}
/**
 * Singleton enforcer class
 * */
class DebuggerPrivateClass
{
	public function DebuggerPrivateClass()
	{
		
	}
}

[ad name=”Google Adsense”]
DebugConsoleArrowButton Class
UI for the scroll buttons. Simple shapes using a triangle to indicate direction of scroll.

package com.lonhosford.util.debug.lite
{
	import flash.display.Sprite;
	import flash.events.MouseEvent;
	import flash.events.TimerEvent;
	import flash.utils.Timer;
	/**
	 * Arrow button UI and logic
	 * */
	public class DebugConsoleArrowButton extends Sprite
	{
		private var _container:Sprite = new Sprite();
		private var _triangle:DebugTriangleShape = new DebugTriangleShape();
		private var _backgroundRect:Sprite = new Sprite();
		private var _width:Number;
		private var _height:Number;
		private var _color:int;										// Color of arrow.
		private var _borderWidth:Number;							// Border width of button.
		private var _borderColor:int;								// Border color of button.
		private var _backgroundColor:int;							// Background color of button.
		private var _direction:Number;								// Rotation of the UI.
		private var _mouseDownStartTimeDelay:Number = 350; 			// Initial delay before starting repeating MouseEvent.CLICK events.
		private var _mouseDownTimeDelay:Number = 100; 				// Delay between each MouseEvent.CLICK event.
		private var _mouseDownTimer:Timer; 							// Timer for repeating MouseEvent.CLICK events.
		/**
		 * Constructor
		 * */
		public function DebugConsoleArrowButton()
		{
			_mouseDownTimer = new Timer(_mouseDownTimeDelay,0); 
			_mouseDownTimer.addEventListener(TimerEvent.TIMER,mouseDownTimerEventHandler);
			_container.addChild(_backgroundRect);			
			_backgroundRect.addChild(_triangle);
			addChild(_container);
		}
		/**
		 * Handler for TimerEvent.TIMER event. Resets the delay interval once the default delay 
		 * is reached.
		 * */
		private function mouseDownTimerEventHandler(event:TimerEvent):void 
		{
			if (_mouseDownTimer.delay == _mouseDownStartTimeDelay)
			{
				_mouseDownTimer.delay = _mouseDownTimeDelay;
			}
			
			var e:MouseEvent = new MouseEvent(MouseEvent.CLICK);
			dispatchEvent(e);
		}
		/**
		 * Sets enabled state.
		 * */
		internal function set enabled(enabledState:Boolean):void
		{
			alpha = enabledState ? 1 : .25;
			if (enabledState)
			{
				addEventListener(MouseEvent.MOUSE_UP,mouseUpEventHandler);
				addEventListener(MouseEvent.MOUSE_DOWN,mouseDownEventHandler);
				addEventListener(MouseEvent.MOUSE_OUT,mouseOutEventHandler);
			}		
		}
		/**
		 * Handler for MouseEvent.MOUSE_OUT event. Stops the mouse down repeat timer.
		 * */
		private function mouseOutEventHandler(e:MouseEvent):void
		{
			_mouseDownTimer.stop();		
		}
		/**
		 * Handler for MouseEvent.MOUSE_UP event. Stops the mouse down repeat timer.
		 * */
		private function mouseUpEventHandler(e:MouseEvent):void
		{
			_mouseDownTimer.stop();		
		}
		/**
		 * Handler for MouseEvent.MOUSE_DOWN event. Starts mouse down timer.
		 * */
		private function mouseDownEventHandler(e:MouseEvent):void
		{
			_mouseDownTimer.delay = _mouseDownStartTimeDelay;
			_mouseDownTimer.start();
		}
		/**
		 * Draw the button UI.
		 * */
		internal function draw(
			p_width:Number, 
			p_height:Number, 
			color:int,
			borderWidth:Number,
			borderColor:int,
			backgroundColor:int,
			direction:Number = 0):void
		{
			_width = p_width;
			_height = p_height;
			_color = color;
			_borderWidth = borderWidth;
			_borderColor = borderColor;
			_backgroundColor = backgroundColor;
			_direction = direction;
		
			_backgroundRect.graphics.clear();
			_backgroundRect.graphics.beginFill(_backgroundColor);
			_backgroundRect.graphics.lineStyle(_borderWidth, _borderColor); 
			_backgroundRect.graphics.drawRect(0, 0, _width - _borderWidth, _height - _borderWidth); 
			_backgroundRect.graphics.endFill();
			
			_triangle.draw( _width  , 0,_color, _color);
			_triangle.scaleX = _triangle.scaleY = .6;
			_triangle.x =  (_triangle.width / 2) + ((_width - _triangle.width - _borderWidth) / 2) ;
			_triangle.y =  (_triangle.height / 2) + ((_height - _triangle.height - _borderWidth) / 2);
			_triangle.rotation = _direction;
		}
	}
}

DebugTriangleShape Class
Utility to draw a rectangle shape with a center registration point.

package com.lonhosford.util.debug.lite
{
	import flash.display.Shape;
	import flash.display.Sprite;
	/**
	 * Utility to draw a triangle shape with a center registration point.
	 * */	
	public class DebugTriangleShape extends Sprite
	{
		
		public function DebugTriangleShape(
		)
		{
		}
		internal function draw(
			size:Number, 
			borderWidth:Number,
			borderColor:int,
			backgroundColor:int
				):void
		{
			graphics.clear();
			graphics.beginFill(backgroundColor);
			graphics.lineStyle(borderWidth, borderColor);
			size = size / 2;
			graphics.moveTo(-size, size);
			graphics.lineTo(-0, -size);  
			graphics.lineTo(size, size );
			
			graphics.endFill();
			
		}
	}
}

DebuggerEvent Class
Events for the Debugger class.

package com.lonhosford.util.debug.lite
{import flash.events.Event;
	/**
	 * Events for the Debugger
	 * @see DebugMessage
	 * @see Debugger
	 * */
	public class DebuggerEvent extends Event
	{
		public static const WRITE:String = "debug.DebuggerEvent.Write";
		public var debugMessage:DebugMessage;
		public function DebuggerEvent(type:String, debugMessage:DebugMessage)
		{
			super(type, bubbles);
			this.debugMessage = debugMessage
		}
		override public function clone():Event 
		{
			return new DebuggerEvent(type, debugMessage);
		}
	}
}

DebugMessage Class
The data values sent with the DebuggerEvent.

package com.lonhosford.util.debug.lite
{
	/**
	 * Data for a DebuggerEvent.
	 * @see DebuggerEvent
	 * */
	public class DebugMessage
	{
		public var text:String;
		public var lineNumber:Number;
		public function DebugMessage()
		{
		}
	}
}

DebugVersion Class
A place to hold the static values for the code.

package com.lonhosford.util.debug.lite
{
	/**
	 * Common version data.
	 * */	
	public final class DebugVersion 
	{
		public static const VERSION:String = "1.00.01";
		public static const AUTHOR:String = "Lon (Alonzo) Hosford";
		public static const AUTHOR_WEB_SITE:String = "https://www.lonhosford.com";
	}
}
Categories
Education History Projects

eLearning Flash Generation Language – Aztec Learning Systems

Phase I:

Developed an eLearning language for generation of Flash movies from client server internet applications. The language can produce learning screens with a variety of assets along with interactive quizzing of students with choices and drag/drop actions.

Design constraints resulted in a low bandwidth (56K) dynamic Flash Movie generator with modular media element component extensibility.

Phase II:

Provided a screen integration team to convert the 4000 screens customer had in their Authorware product to the new screen language.

Phase III:

Added template based gui wizard to generate eLearning language. Designed for less technical educators to develope educational lesson without having to know the eLearning language.

Software allows client technicians to develop and unlimited number of screen templates that control one or more gui dialog windows.

The gui controls are further customizable to limit or expand user´s choices.

Software involved developing a low bandwidth object oriented gui library (windows, buttons, combo boxes, scrollers) with a base movie footprint under 40K.

The gui dialogs were designed using a external dynamic loading component based design. This allows for development an unlimited variety of gui dialogs without increasing the size of the base movie.

Categories
Articles

Actionscript 3 Animating Sprite Rotation Following Mouse Movement

By Lon (Alonzo) Hosford

This my own version of of Keith Peter’s Foundation Actionscript 3.0 Animation: Making Things Move chapter 3 implementation of sprite rotation following a mouse.

Download files
[August 10 2010 – I updated this to an Actionscript project in Flex Builder 4. ]

Keith Peters AS3 Animation
Learn More

You can build this with the free Flex SDK by using the code in the src folder. Same for Flash CS3 and later versions. You need to create a Flash Document in the src folder and set the document class to Chapter03_Rotation_AS3. For your convenience the Flash CS4 example download is included.

This article shows the code for the Flex project.

Application Class – Chapter03_Rotation_Flex
This Flex version is a spark implementation. The SpriteVisualElement component shown on line 51 is used to add the code to the application display on line 31.

<?xml version="1.0" encoding="utf-8"?>
<!--
	Application class for showing sprite rotation following mouse movement. 
	<p>Author: Lon Hosford https://www.lonhosford.com 908 996 3773</p>
    <p>Reference: Keith Peter's Actionscript 3.0 Animation Chapter 3</p>
	
-->
<s:Application xmlns:fx="http://ns.adobe.com/mxml/2009" 
			   xmlns:s="library://ns.adobe.com/flex/spark" 
			   xmlns:mx="library://ns.adobe.com/flex/mx" width="400" height="400"
			   creationComplete="creationCompleteHandler(event)" 
			   viewSourceURL="srcview/index.html">
	<fx:Script>
		<![CDATA[
			import mx.events.FlexEvent;
			
			// Properties for background
			private static const backgroundColor:Number = 0x0000ff;
			private static const backgroundBorderColor:Number = 0x666666;
			private static const backgroundBorderWeight:Number = 2;
			/**
			 * Handler for Application creationComplete event
			 * */
			protected function creationCompleteHandler(event:FlexEvent):void
			{
				// Create an Arrow object
				var arrow:Arrow = new Arrow();
				// Wrap arrow object into a RotateSpriteToMouse object
				var rotateToMouse:RotateSpriteToMouse = new RotateSpriteToMouse(arrow);
				// Add rotateToMouse Sprite to a SpriteVisualElement
				arrowVisualElement.addChild(rotateToMouse);
				// Center the SpriteVisualElement
				arrowVisualElement.x = background_bc.width / 2;
				arrowVisualElement.y = background_bc.height / 2;
			}

		]]>
	</fx:Script>
	<!--- 
	Background for app 
	--> 
	<s:BorderContainer id = "background_bc"
					   width="{width}" height = "{height}"
					   borderWeight="{backgroundBorderWeight}"
					   borderColor="{backgroundBorderColor}"
					   backgroundColor="{backgroundColor}">

		<!--- 
		Spark container for Sprite 
		--> 
		<s:SpriteVisualElement id="arrowVisualElement" />

	</s:BorderContainer>
					   
</s:Application>

[ad name=”Google Adsense”]
RotateSpriteToMouse Class
This is the class that does the work. Listening to the Event.ENTER_FRAME event leads to the update_rotation() method that does the work of updating the rotation.

package
{
	import flash.display.Sprite;
	import flash.events.Event;
	/**
	 * Rotates sprite to mouse position
	 * */
	public class RotateSpriteToMouse extends Sprite
	{
		private var _sprite_to_rotate:Sprite;	// Sprite to rotate to mouse
		/**
		 * Constructor 
		 * @param sprite_to_rotate The sprite to rotate
		 * */
		public function RotateSpriteToMouse(sprite_to_rotate:Sprite)
		{
			_sprite_to_rotate = sprite_to_rotate;
			addChild(_sprite_to_rotate);
			addEventListener(Event.ENTER_FRAME, enterFrameEventHandler);
		}
		/**
		 * The event handler for Event.ENTER_FRAME
		 * */
		private function enterFrameEventHandler(event:Event):void
		{
			update_rotation();
		}
		/**
		 * Updates the rotation of the _sprite_to_rotate
		 * */
		private function update_rotation():void
		{
			// Triangle adjacent angle side distance for the x value.
			var dx:Number = mouseX - _sprite_to_rotate.x;
			// Triangle opposite angle side distance for the y value.
			var dy:Number = mouseY - _sprite_to_rotate.y;
			// Compute angle in radians from the sprite to the mouse position.
			var radians:Number = Math.atan2(dy, dx);
			// Convert radians to degrees
			_sprite_to_rotate.rotation = radians * 180 / Math.PI;
		}
	}
}

Arrow Class
Simple arrow sprite that Keith wrote. Key here is the center registration point.

package
{
	import flash.display.Sprite;
	/**
	 * Creates an arrow sprite with fixed dimensions
	 * */
	public class Arrow extends Sprite
	{
		public function Arrow() 
		{
			draw();
		}
		/**
		 * Draw the arrow
		 * */
		private function draw():void
		{
			graphics.lineStyle(1, 0, 1);
			graphics.beginFill(0xffff00);
			graphics.moveTo(-50, -25);
			graphics.lineTo(0, -25);
			graphics.lineTo(0, -50);
			graphics.lineTo(50, 0);
			graphics.lineTo(0, 50);
			graphics.lineTo(0, 25);
			graphics.lineTo(-50, 25);
			graphics.lineTo(-50, -25);
			graphics.endFill();
		}
	}
	
}
Categories
Articles

Actionscript 3 Animation Following the Mouse to Show Velocity at an Angle

By Lon (Alonzo) Hosford

See also the same done in HTML5 canvas HTML5 Canvas Based Animation Rotate Arrow To Mouse Position

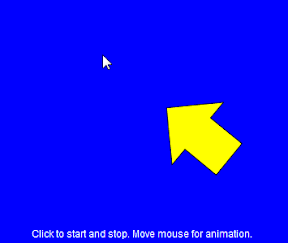
In chapter 5 of Keith Peter’s Foundation Actionscript 3.0 Animation: Making Things Move velocity at an angle is explained. I took Keith’s mouse following example demonstrating velocity at an angle and punched it up a small notch.

Download files
[August 10 2010 – I updated this to an Actionscript project in Flex Builder 4. ]

You can build this with the free Flex SDK by using the code in the src folder. Same for Flash CS3 and later versions. You need to create a Flash Document in the src folder and set the document class to Chapter05_FollowMouse. For your convenience the Flash CS4 example download is included.

Keith Peters AS3 Animation
Learn More

This article shows the code for the Flex project. This Flex version is a spark implementation.

The arrow will follow the mouse around the stage. It will stop following when requested and start again with a mouse click on the stage. It also waits patiently when the mouse leaves the stage. The arrow gets real frustrated when you put the mouse over it. It always points towards the mouse when the mouse is over the stage.

Application Class – Chapter04_SprayPaint
I added user mouse click interaction to control the start and stop movement of the _arrow sprite. See line 40 and lines 48 to 51.

The movement also stops and starts when the mouse enters and leaves the stage. To accomplish that the stage needed to register a Event.MOUSE_LEAVE event to detect the mouse leaving the stage. The stage object is available when the applicationComplete(...) event occurs. The MouseEvent.MOUSE_MOVE sufficed to detect the mouse back over the stage. The _mouseOverStage variable carries the state of the mouse over the stage.

The rotation of the _arrow sprite is continuous. Gives it a mouse awareness state.

<?xml version="1.0" encoding="utf-8"?>
<!--
	Application class to demonstrate animation trigonometry to show velocity at an angle. 
    Mouse position determines the angle. 
	<p>Author: Lon Hosford https://www.lonhosford.com 908 996 3773</p>
    <p>Reference: Keith Peter's Actionscript 3.0 Animation Chapter 5</p>
	
-->
<s:Application xmlns:fx="http://ns.adobe.com/mxml/2009" 
			   xmlns:s="library://ns.adobe.com/flex/spark" 
			   xmlns:mx="library://ns.adobe.com/flex/mx" width="400" height="400"
			   applicationComplete="applicationCompleteHandler(event)"
			   viewSourceURL="srcview/index.html">
	<fx:Script>
		<![CDATA[
			import mx.events.FlexEvent;
			public static const backgroundColor:Number = 0x0000ff;
			public static const backgroundBorderColor:Number = 0x666666;
			public static const backgroundBorderWeight:Number = 2;
			
			private var _instructions_tf:TextField;						// Instructions for user
			[Bindable]
			private var _lang_instructions:String = "Click to start and stop. Move mouse for animation."
			private var _arrow:Arrow;									// Animated sprite is an Arrow 
			private var _speed:Number = 5;								// Movement speed
			private var _allowMoving:Boolean = false;					// Use allowing moving state
			private var _mouseOverStage:Boolean = true;					// Mouse on the stage state
			
			/**
			 * Handler for Application applicationComplete event
			 * */
			protected function applicationCompleteHandler(event:FlexEvent):void
			{
				// Create Arrow object and add to stage. This is animated.
				_arrow = new Arrow();
				arrowVisualElement.addChild(_arrow);
				_arrow.x = (width - _arrow.width ) / 2;
				_arrow.y = (height - _arrow.height ) / 2;
				
				
				stage.addEventListener(MouseEvent.CLICK, mouseClickEventHandler);
				stage.addEventListener(MouseEvent.MOUSE_MOVE, mouseMoveEventHandler);
				stage.addEventListener(Event.ENTER_FRAME, enterFrameEventHandler);
				stage.addEventListener(Event.MOUSE_LEAVE, mouseLeaveEventHandler);
			}
			/**
			 * MouseEvent.CLICK handler
			 * */
			private function mouseClickEventHandler(event:MouseEvent):void
			{
				_allowMoving = !_allowMoving;
			}
			/**
			 * MouseEvent.MOUSE_MOVE handler
			 * */
			private function mouseMoveEventHandler(event:MouseEvent):void
			{
				_mouseOverStage = true;
			}
			/**
			 * Event.MOUSE_LEAVE handler
			 * */
			private function mouseLeaveEventHandler(event:Event):void
			{
				_mouseOverStage = false;
			}
			
			/**
			 * Event.ENTER_FRAME handler
			 * */
			private function enterFrameEventHandler(event:Event):void
			{
				draw();
			}

[ad name=”Google Adsense”]
The draw() method on line 77 updates the animation. The dx and dy variables are the distance from the mouse to the registration point of the _arrow sprite. Radians for the angle are computed using the Math.atan2(...) method. The angle in radians is converted for Actionscript rotation property to degrees. These trigonometry formulas are covered in Keith’s book .

The state the user choose to have the mouse follow is tested and if true the moveTo() method on line 98 computes the velocity at an angle discussed in chapter 5.

The _arrow sprite is designed with a center registration point to facilitate the rotation. As a result the _arrow sprite will move until the mouse coordinates reach the registration point. I added the hitTestPoint(...) method on line 105 to adjust so that the movement stops at the edge of the pixels in the _arrow sprite. The result the _arrow sprite’s point comes very close to the mouse versus the center of the _arrow sprite.

			/**
			 * Draw
			 * */
			private function draw():void
			{		
				// Distance of arrow registration point from mouse
				var dx:Number = mouseX - _arrow.x ;
				var dy:Number = mouseY - _arrow.y ;
				
				// Get angle in radians
				var angle:Number = Math.atan2(dy, dx);
				// Rotate converting radians to degrees
				_arrow.rotation = angle * 180 / Math.PI;
				
				// Is in a mouse following state
				if (_allowMoving)
				{
					// Move based on angle
					moveTo(angle);
				}
			}
			/**
			 * Move arrow
			 * */
			private function moveTo(angle:Number):void
			{
				// Velocity based on angle
				var vx:Number = Math.cos(angle) * _speed;
				var vy:Number = Math.sin(angle) * _speed;
				
				// Mouse position overlaps shape and mouse is over a pixel in the object
				if (!_arrow.hitTestPoint(mouseX, mouseY, true) && _mouseOverStage)
				{
					// Add velocity to position
					_arrow.x += vx ;
					_arrow.y += vy ;
				}
			}
			/**
			 * Set any stage options per your needs
			 * */
			private function initStage():void 
			{
				stage.scaleMode = StageScaleMode.NO_SCALE;
			}
			/**
			 * Instructions for user
			 * */
			private function getInstructions_tf():TextField 
			{
				var tf:TextField = new TextField();
				tf.autoSize = TextFieldAutoSize.LEFT;			
				tf.background = true;
				var textFormat:TextFormat = new TextFormat();
				textFormat.font = "_typewriter";
				tf.defaultTextFormat = textFormat;
				tf.text = _lang_instructions;
				return tf;
			}
		]]>
	</fx:Script>

[ad name=”Google Adsense”]
This part of the application represents the Flex UI based in Spark components.

	<!--- 
	Background for app 
	--> 
	<s:BorderContainer id = "background_bc"
					   width="{width}" height = "{height}"
					   borderWeight="{backgroundBorderWeight}"
					   borderColor="{backgroundBorderColor}"
					   backgroundColor="{backgroundColor}">

		<!--- 
		Spark container for Sprite 
		--> 
		<s:SpriteVisualElement id="arrowVisualElement" />

	</s:BorderContainer>
	<!--- 
	Instructions 
	--> 
	<s:HGroup  horizontalAlign="center" x="0" y="378" width = "100%">
		<s:Label text="{_lang_instructions}" color="0xffffff"/>
	</s:HGroup>
					   
</s:Application>

[ad name=”Google Adsense”]

Categories
Articles

Actionscript 3 Spray Paint with BitmapData

By Lon (Alonzo) Hosford

This my own version of of Keith Peter’s Foundation Actionscript 3.0 Animation: Making Things Move chapter 4 use of the BitmapData class to create a spray paint example.

Download files
[August 10 2010 – I updated this to an Actionscript project in Flex Builder 4. ]

You can build this with the free Flex SDK by using the code in the src folder. Same for Flash CS3 and later versions. You need to create a Flash Document in the src folder and set the document class to Chapter04_SprayPaint. For your convenience the Flash CS4 example download is included.

Keith Peters AS3 Animation
Learn More

This article shows the code for the Flex project. This Flex version is a spark implementation.

Application Class – Chapter04_SprayPaint
The canvas instance of the BitmapData class is instantiated line 32. The BitmapData class setPixel32(...) method on line 83 is used to set the color and alpha transparency values of a single 32 bit pixel.

The overall user interaction is mouse down start the enter frame events that call the draw() method and also to select a random color.

<?xml version="1.0" encoding="utf-8"?>
<!--
	Application class to demonstrate use of the BitmapData class along with animation trigonometry. 
	<p>Author: Lon Hosford https://www.lonhosford.com 908 996 3773</p>
    <p>Reference: Keith Peter's Actionscript 3.0 Animation Chapter 4</p>
	
-->
<s:Application xmlns:fx="http://ns.adobe.com/mxml/2009" 
			   xmlns:s="library://ns.adobe.com/flex/spark" 
			   xmlns:mx="library://ns.adobe.com/flex/mx" width="400" height="400"
			   creationComplete="creationCompleteHandler(event)" 
			   viewSourceURL="srcview/index.html">
	<fx:Script>
		<![CDATA[
			import mx.events.FlexEvent;
			
			// Properties for background
			private static const backgroundColor:Number = 0xffffff;
			private static const backgroundBorderColor:Number = 0x666666;
			private static const backgroundBorderWeight:Number = 2;
			private var canvas:BitmapData;			// Pixel level access
			private var color:uint;					// Randomly generated spray brush colors
			private var size:Number = 20;			// Size of the spray brush
			private var density:Number = 50;		// Number of pixels sprayed per frame
			/**
			 * Handler for Application creationComplete event
			 * */
			protected function creationCompleteHandler(event:FlexEvent):void
			{
				
				// Create BitmapData object allowing use to work with pixels
				canvas = new BitmapData( background_bc.width,background_bc.height, true, 0x00000000);
				var bmp:Bitmap =  new Bitmap(canvas);
				
				// Add itmapData object to a SpriteVisualElement
				arrowVisualElement.addChild(bmp);
				// Handlers for mouse events to signal drawing.
				addEventListener(MouseEvent.MOUSE_DOWN, mouseDownEventHandler);
				addEventListener(MouseEvent.MOUSE_UP, mouseUpEventHandler);
			}
			/**
			 * Event handler for MouseEvent.MOUSE_DOWN
			 * */
			private function mouseDownEventHandler(event:Event):void 
			{
				// Random color from 0 to highest color value which is white
				// and then add alpha channel of opaque
				color = Math.random() * 0xffffff + 0xff000000;
				// Start enter frame events
				stage.addEventListener(Event.ENTER_FRAME, enterFrameEventHandler);
			}
			/**
			 * Event handler for MouseEvent.MOUSE_UP
			 * */
			private function mouseUpEventHandler(event:Event):void 
			{
				stage.removeEventListener(Event.ENTER_FRAME, enterFrameEventHandler);
			}
			/**
			 * Event handler for Event.ENTER_FRAME
			 * */
			private function enterFrameEventHandler(event:Event):void 
			{
				draw();
			}

[ad name=”Google Adsense”]
The draw method uses the density variable on line 72 to determine the number of pixels to color using randomization to compute an angle and a radius within the size of the brush.

Each pixel is basically a point on its own circle. The mouse is becomes a center point for a random circle with a diameter up to the size variable. Line 77 computes the radius for that circle.

Keith’s formulas for computing points on a circle math from chapter 3 are then used to compute the position of the pixel on lines 79 and 81.


			/**
			 * Draw
			 * */
			private function draw():void 
			{
				// Repeat for number of pixels - density.
				for (var i:int = 0; i < density; i++)
				{
					// Random angle 0 - 6.2832 radians  (0 - 360)
					var angle:Number = Math.random() * Math.PI * 2;
					// Radius is random percentage of maximum radius (size / 2)
					var radius:Number = Math.random() * size / 2;
					// Center is mouseX to compute the x point
					var xpos:Number = mouseX + Math.cos(angle) * radius;
					// Center is mouseY to compute the y point
					var ypos:Number = mouseY + Math.sin(angle) * radius;
					//Set the color and alpha transparency values of a single 32 bit pixel.
					canvas.setPixel32(xpos, ypos, color);
					
				}
			}

		]]>
	</fx:Script>

[ad name=”Google Adsense”]
The SpriteVisualElement component allows adding the canvas BitmapData object to the display list.

	<!--- 
	Background for app 
	--> 
	<s:BorderContainer id = "background_bc"
					   width="{width}" height = "{height}"
					   borderWeight="{backgroundBorderWeight}"
					   borderColor="{backgroundBorderColor}"
					   backgroundColor="{backgroundColor}">

		<!--- 
		Spark container for Sprite 
		--> 
		<s:SpriteVisualElement id="arrowVisualElement" />

	</s:BorderContainer>
	<!--- 
	Instructions 
	--> 
	<s:Label x="96" y="378" text="Click and drag mouse to spray paint."/>
					   
</s:Application>
Categories
Articles

Factory Design Pattern Actionscript 3 Print Center – Sanders & Cumaranatunge – Part 2 of 2

By Lon (Alonzo) Hosford

This is the expanded print center Factory design pattern from chapter 2 of William Sanders and Chandima Cumaranatunge Actionscript 3.0 Design Patterns.

Actionscript 3 Design Patterns Learn More

This is an ActionScript project created in Flex Builder and updated to Flex Builder 4. Download the example code. You can build this with the free Flex SDK by using the code in the src folder. Same for Flash CS3 and CS4. You need to create a Flash Document in the src folder and set the document class to Chapter02_Factory_PrintCenters. For your convenience you can download a Flash CS4 ready to go example.

This includes a basic Actionscript debugger console to display tracing statements on stage. Each class sends messages to the console to show their methods working. These messages help you follow the relationships in the Factory design pattern.

The classes that from part 1 are not repeated. Click here to review them.

Application Class – Chapter02_Factory_PrintCenters
This is the client class. It repeats the client class discussed in part 1 use or the PrintCenter classes. It also access the new HighVolPrinterCenter2 and LowVolPrinterCenter2 classes on line 48 and 54 respectively. These are subclasses of the new PrintCenter2. These are new creator classes that take parameters to determine which IPrintJob classes to select. The original PrintCenter subclasses HighVolPrinterCenter2 and LowVolPrinterCenter2 still remain and still work.

/**
 * Demonstrates a more concrete example of decoupling the client, this file, from the products.
 * In this case the products are print jobs on various printers. The print jobs are not coupled
 * to the client. This example uses parameters for the factory choices.
 * <p>
 * This is part two of the example. Additional IPrintJob classes are added along with a second creator
 * classes that take parameters for the type of printing.
 * </p>
 * */
package
{
	import com.lonhosford.util.debug.lite.DebugConsole;

	import flash.display.Sprite;

	import printcenters.HighVolPrinterCenter;
	import printcenters.HighVolPrinterCenter2;
	import printcenters.LowVolPrinterCenter;
	import printcenters.LowVolPrinterCenter2;
	import printcenters.PrintCenter;
	import printcenters.PrintCenter2;

	// {SET STAGE SIZE AND SPEED HERE}
	[SWF(width=500, height = 300, frameRate = 30)]
	public class Chapter02_Factory_PrintCenters extends Sprite
	{
		private var debugConsole:DebugConsole = DebugConsole.getInstance();
		public function Chapter02_Factory_PrintCenters()
		{
			stage.addChild(debugConsole);
			debugConsole.width = stage.stageWidth;
			debugConsole.height = stage.stageHeight;

			debugConsole.write("Actionscript 3.0 Design Patterns");
			debugConsole.write("William Sanders & Chandima Cumaranatunge");
			debugConsole.write("Chapter 2 Print Centers Example");
			debugConsole.write("\n");

			debugConsole.write("\nPrint LongThesis.doc to high volume printer.");
			var pcHighVol:PrintCenter = new HighVolPrinterCenter();
			pcHighVol.print("LongThesis.doc");

			debugConsole.write("\nPrint ShortVita.doc to low volume printer.");
			var pcLowVol:PrintCenter = new LowVolPrinterCenter();
			pcLowVol.print("ShortVita.doc");

			debugConsole.write("\nPrint LongThesis.doc to high volume BW printer.");
			var pc2HighVol:PrintCenter2 = new HighVolPrinterCenter2();
			pc2HighVol.print("LongThesis.doc", HighVolPrinterCenter2.BW);
			debugConsole.write("\nPrint SalesReport.doc to high volume COLOR printer.");
			pc2HighVol.print("SalesReport.doc", HighVolPrinterCenter2.COLOR);

			debugConsole.write("\nPrint LongThesis.doc to low volume BW printer.");
			var pc2LowVol:PrintCenter2 = new LowVolPrinterCenter2();
			pc2LowVol.print("LongThesis.doc", LowVolPrinterCenter2.BW);
			debugConsole.write("\nPrint SalesReport.doc to low volume COLOR printer.");
			pc2LowVol.print("SalesReport.doc", LowVolPrinterCenter2.COLOR);

		}
	}
}

PrintCenter2 Class
The main change over PrintCenter class is the printType parameter in the print() method on line 17 and the createPrintJob() factory method on line 27. Each PrintCenter2 subclass uses the printType parameter to determine which IPrintJob class to create. This expands the capability of unlimited new IPrintJob classes for any single PrintCenter2 creator class.

package printcenters
{
	import flash.errors.IllegalOperationError;
	/**
	 * Handles file printing. Paramatizes the type of print job.
	 * */
	public class PrintCenter2
	{
		public function PrintCenter2()
		{
		}
		/**
		 * Simulate printing a file.
		 * @param fileName Name of file to print.
		 * @param printType Name of file to print.
		 * */
		public function print(fileName:String, printType:uint):void
		{
			var printjob:IPrintJob = this.createPrintJob(printType);
			printjob.start(fileName);
		}
		/**
		 * Creates the IPrintJob products.
		 * @throws flash.errors.IllegalOperationError Must override in subclass.
		 * @param printType Name of file to print.
		 * */
		protected function createPrintJob(printType:uint):IPrintJob
		{
			throw new IllegalOperationError("PrintCenter2.createPrintJob() - override in subclass");
			return null;
		}
	}
}

HighVolPrintCenter2 Class
The key change over the HighVolPrintCenter class are the BW and COLOR constants on line 10 and 11 respectively. These are the printType parameter values for selecting the IPrintJob class to use.

The createPrintJob() function on line 23 uses the code>BW and COLOR constants to select the WorkgroupPrintJob and the new ColorLaserPrintJob product classes. Any other parameter throws an Error.

package printcenters
{
	import com.lonhosford.util.debug.lite.Debugger;
	/**
	 * HighVolPrinterCenter creator class
	 * */
	public class HighVolPrinterCenter2 extends PrintCenter2
	{
		private var debugger:Debugger = Debugger.getInstance();
		public static const BW:uint = 0;
		public static const COLOR:uint = 1;
		public function HighVolPrinterCenter2()
		{
			debugger.write("HighVolPrinterCenter2() - This is a creator.")
		
		}
		/**
		 * Create IPrintJob object.
		 * @param printType Name of file to print.
		 * @return ColorLaserPrintJob | WorkgroupPrintJob based on printType
		 * @throws Error When printType is not matched.
		 * */
		override protected function createPrintJob(printType:uint):IPrintJob
		{
			
			if (printType == BW)
			{
				debugger.write("HighVolPrinterCenter2.createPrintJob() - BW");
				return new WorkgroupPrintJob();
			}
			else if (printType == COLOR)
			{
				debugger.write("HighVolPrinterCenter2.createPrintJob() - COLOR");
				return new ColorLaserPrintJob();
				
			}
			else
			{
				throw new Error("HighVolPrinterCenter2.createPrintJob() - Invalid printer kind.");
				return null;
			}
			
		}
	}
}

LowVolPrintCenter2 Class
This mimics the HighVolPrintCenter2 class. The InkJetPrintJob and the new ColorInkjetPrintJob product classes are selected by the printerType parameter supplied to the createPrintJob(...) function on line 23. Lines 10 and 11 contain valid values for the printerType parameter.

package printcenters
{
	import com.lonhosford.util.debug.lite.Debugger;
	/**
	 * LowVolPrinterCenter creator class
	 * */
	public class LowVolPrinterCenter2 extends PrintCenter2
	{
		private var debugger:Debugger = Debugger.getInstance();
		public static const BW:uint = 0;
		public static const COLOR:uint = 1;
		public function LowVolPrinterCenter2()
		{
			debugger.write("LowVolPrinterCenter2() - This is a creator.")
		
		}
		/**
		 * Create IPrintJob object.
		 * @param printType Name of file to print.
		 * @return InkJetPrintJob | ColorInkjetPrintJob based on printType
		 * @throws Error When printType is not matched.
		 * */
		override protected function createPrintJob(printType:uint):IPrintJob
		{
			
			if (printType == BW)
			{
				debugger.write("LowVolPrinterCenter2.createPrintJob() - BW");
				return new InkJetPrintJob();
			}
			else if (printType == COLOR)
			{
				debugger.write("LowVolPrinterCenter2.createPrintJob() - COLOR");
				return new ColorInkjetPrintJob();
				
			}
			else
			{
				throw new Error("LowVolPrinterCenter2.createPrintJob() - Invalid low volume print type.");
				return null;
			}
			
		}
	}
}

[ad name=”Google Adsense”]
There are some new IPrintJob classes introduced. They simulate newer types of products available to the creator classes.

ColorLaserPrintJob Class
Nothing unusual here. Just another IPrintJob class.

package printcenters
{
	import com.lonhosford.util.debug.lite.Debugger;
	/**
	 * ColorLaserPrintJob product class
	 * */
	internal class ColorLaserPrintJob implements IPrintJob
	{
		private var debugger:Debugger = Debugger.getInstance();
		public function ColorLaserPrintJob()
		{
			debugger.write("ColorLaserPrintJob()")
		}
		/**
		 * Simulate starting an ColorInkjetPrintJob
		 * @param fileName Name of file to print.
		 * */		
		public function start(fileName:String):void
		{
			debugger.write("ColorLaserPrintJob.start() - fileName:" + fileName);
		}
	}
}

ColorInkjetPrintJob Class
Another IPrintJob class. They can be pounded out. Anyone want to make a dot matrix print job?

package printcenters
{
	import com.lonhosford.util.debug.lite.Debugger;
	/**
	 * ColorInkjetPrintJob product class
	 * */
	internal class ColorInkjetPrintJob implements IPrintJob
	{
		private var debugger:Debugger = Debugger.getInstance();
		public function ColorInkjetPrintJob()
		{
			debugger.write("ColorInkjetPrintJob()")
		}
		/**
		 * Simulate starting an ColorInkjetPrintJob
		 * @param fileName Name of file to print.
		 * */		
		public function start(fileName:String):void
		{
			debugger.write("ColorInkjetPrintJob.start() - fileName:" + fileName);
		}
	}
}